Satellite Sky Blanket: Free Crochet Pattern
Introduction
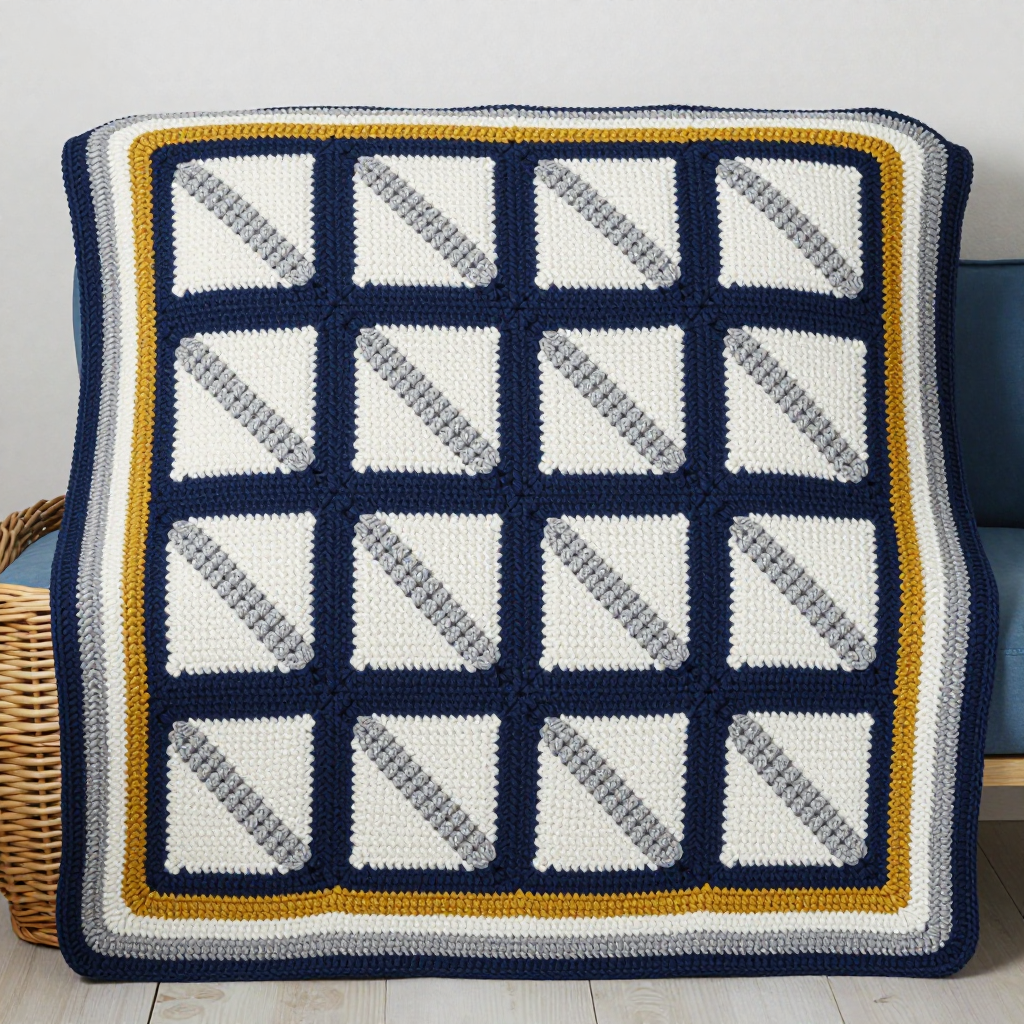
The Satellite Sky Blanket is a cozy, space-themed throw that brings a little galaxy into your living room. It is designed for beginners who want to try corner-to-corner (C2C) crochet without a complicated graph, and for anyone who loves a bold, graphic look. Each square is a deep navy field with a diagonal silver band that reads as a satellite streaking across the sky, and the blocky C2C texture gives the whole blanket a soft, squishy feel. Worked in worsted weight acrylic, it is warm, easy-care, and quick enough to finish in a few evenings of relaxed crocheting.
Materials Needed
- Yarn: Worsted weight (4) acrylic yarn. Color A (Navy): 1200 yards. Color B (Silver): 600 yards. Color C (White): 400 yards. Color D (Gold): 200 yards.
- Hook: 5.5 mm (I/9) crochet hook.
- Notions: Tapestry needle, scissors, stitch markers, measuring tape.
- Finished size: Each satellite square is 15 x 15 inches (38 x 38 cm). The finished blanket with border is 59 x 78 inches (150 x 198 cm).
Abbreviations
- ch: chain — make a loop of yarn and pull it through the loop on your hook.
- dc: double crochet — a tall stitch made by wrapping the yarn once before pulling through the loops.
- sc: single crochet — a short, firm stitch made by pulling up a loop and closing it once.
- sl st: slip stitch — a joining stitch that pulls the yarn straight through the loop on your hook.
- st(s): stitch(es).
- C2C: corner-to-corner — a technique of building a square diagonally with small blocks (tiles) of ch 3 + 3 dc.
Gauge
6 C2C tiles = 10 x 10 cm (4 x 4 inches). To check it, work a small swatch of tiles and measure across 6 tiles; if your tiles are larger, go down a hook size, and if smaller, go up a hook size.
Tips Before You Start
- Keep your tension relaxed and even. C2C tiles look best when every ch-3 space is the same size, so avoid pulling the chains tight.
- Wind each color into its own ball before you begin. The silver band grows quickly, and having Color B ready keeps your rows flowing.
- Count your tiles at the end of every increase row. Each row should have exactly one more tile than the row before it.
- Lay finished squares flat and face up as you go, all facing the same direction, so the diagonal silver bands line up neatly at assembly.
Step-by-Step Instructions
Satellite Square (make 12)
Each square is worked in C2C with Color A as the background and Color B for the diagonal satellite band. A tile is made as ch 3, then 3 dc into the ch-3 space of the tile below. The square is 29 x 29 tiles: 15 increase rows, then 14 decrease rows.
Row 1: With Color A, ch 6, dc in 4th ch from hook and in each of next 2 ch (1 tile).
Row 2: Ch 6, turn, dc in 4th ch from hook and in next 2 ch, sl st into the ch-3 space of the tile below, ch 3, 3 dc in same space (2 tiles).
Rows 3–15: Continue increasing in Color A, adding 1 tile per row, until Row 15 is complete (15 tiles).
From Row 16 the square begins to decrease on one edge while the silver band grows along the other. Work the decrease edge by slip stitching across the first tile, then continue in pattern.
Row 16: A14, B1 (14 tiles).
Row 17: A13, B2 (13 tiles).
Row 18: A12, B3 (12 tiles).
Row 19: A11, B4 (11 tiles).
Row 20: A10, B5 (10 tiles).
Row 21: A9, B6 (9 tiles).
Row 22: A8, B7 (8 tiles).
Row 23: A7, B8 (7 tiles).
Row 24: A6, B9 (6 tiles).
Row 25: A5, B10 (5 tiles).
Row 26: A4, B11 (4 tiles).
Row 27: A3, B12 (3 tiles).
Row 28: A2, B13 (2 tiles).
Row 29: A1, B14 (1 tile). Fasten off.
Note on colors: Color C (White) is reserved for the border and Color D (Gold) for the final border round. The square itself uses only Color A and Color B so the diagonal band stays crisp.
Assembly
Arrange the 12 squares in 3 rows of 4 squares each, all facing the same direction so the silver bands run consistently. Join squares with single crochet in Color A, working through both loops of each stitch along the edges.
Border
Round 1: With Color A, sc evenly around the entire blanket, working 3 sc in each corner. Join with sl st.
Round 2: Ch 1, sc in each sc around, 3 sc in each corner. Join with sl st.
Round 3: Change to Color B, repeat Round 2.
Round 4: Change to Color C, repeat Round 2.
Round 5: Change to Color D, repeat Round 2. Fasten off.
Assembly and Finishing
Seam the squares with single crochet in Color A as described, keeping your joining stitches loose so the blanket stays flexible. Weave in all ends on the wrong side, threading each tail through several stitches before trimming. Block the finished blanket by misting it lightly and laying it flat to the finished measurements of 59 x 78 inches (150 x 198 cm), pinning the corners square; let it dry completely before use.
Pro Tips and Variations
- Swap Color B for a soft teal or lavender to change the mood of the satellite band while keeping the same layout.
- Add a sixth border round in Color A for a wider, more framed edge.
- Make a smaller baby version by using 6 squares in 2 rows of 3 and working 3 border rounds instead of 5.