Lavender Mandala Circle Square Applique Free Crochet Pattern
Lavender Mandala Circle Square Applique – Free Crochet Pattern
Introduction
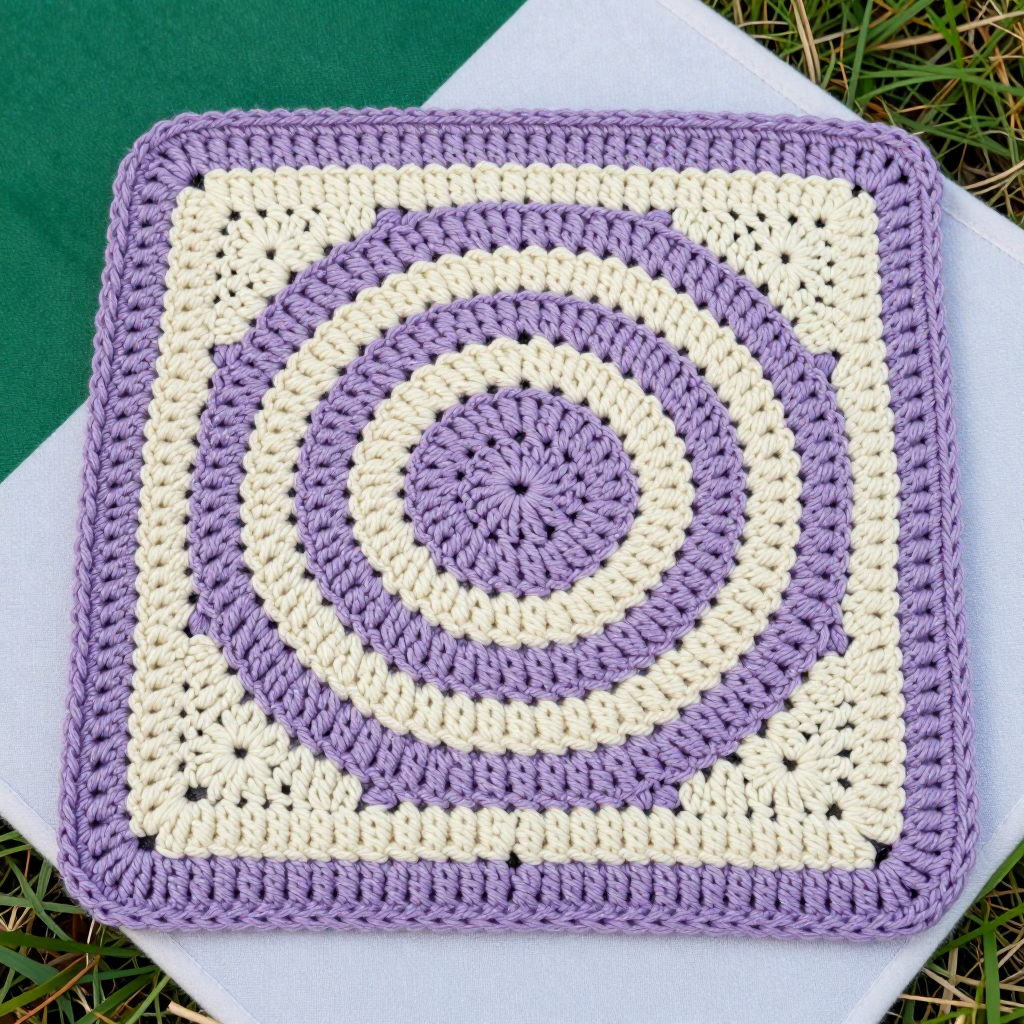
This Lavender Mandala Circle Square Applique is a small, satisfying project that looks far more intricate than it actually is. It's designed for advanced beginners who are comfortable with single crochet, double crochet, and simple increases, and it's a lovely way to use up leftover worsted weight yarn. The design starts as a flat, concentric mandala in soft lavender, cream, and light purple, then gets squared off with a simple double crochet border so it sits neatly on blankets, bags, or pillows. Worked up in smooth acrylic or cotton, the finished piece is flat, lightweight, and blocks to a crisp 6" x 6" square that feels soft to the touch and easy to sew onto almost anything.
Materials Needed
- Yarn: Worsted weight (4) acrylic or cotton in three colors:
- Color A – lavender: about 20 yards
- Color B – cream: about 15 yards
- Color C – light purple: about 10 yards
- Hook: 5.0 mm (H-8) crochet hook
- Notions: Tapestry needle for weaving in ends, scissors, stitch marker (optional, for the magic ring)
- Finished size: 6" x 6" (15 cm x 15 cm) after blocking
Abbreviations
- MR – magic ring: an adjustable loop you crochet into to start a round with no hole
- sc – single crochet
- dc – double crochet
- inc – increase: work 2 sc in the same stitch
- ch – chain
- sl st – slip stitch
- st(s) – stitch(es)
- rep – repeat
Gauge
First 3 rounds = 2" (5 cm) in diameter. To check, work Rounds 1–3 as written and measure straight across the circle; if it's larger than 2", go down a hook size, and if it's smaller, go up a hook size.
Tips Before You Start
- Keep your tension even and slightly loose so the concentric rings stay flat; if the circle starts to cup, your stitches are too tight.
- Change colors on the last stitch of the previous round (pull the new color through the final loop) so the color joins look clean.
- Count your stitches at the end of every round — each round adds exactly 6 stitches, so any miscount will throw off the flat circle.
- Don't fasten off after Round 12; the same lavender yarn carries straight into the squaring round.
Step-by-Step Instructions
Center Mandala (Rounds 1–12)
Rnd 1 (A): MR, 6 sc into the ring, join with sl st to first sc (6 sts).
Rnd 2 (A): ch 1, inc in each st around, join (12 sts).
Rnd 3 (A): ch 1, [sc, inc] x6, join (18 sts).
Rnd 4 (A): ch 1, [2 sc, inc] x6, join (24 sts). Change to B.
Rnd 5 (B): ch 1, [3 sc, inc] x6, join (30 sts).
Rnd 6 (B): ch 1, [4 sc, inc] x6, join (36 sts). Change to C.
Rnd 7 (C): ch 1, [5 sc, inc] x6, join (42 sts).
Rnd 8 (C): ch 1, [6 sc, inc] x6, join (48 sts). Change to B.
Rnd 9 (B): ch 1, [7 sc, inc] x6, join (54 sts).
Rnd 10 (B): ch 1, [8 sc, inc] x6, join (60 sts). Change to A.
Rnd 11 (A): ch 1, [9 sc, inc] x6, join (66 sts).
Rnd 12 (A): ch 1, [10 sc, inc] x6, join (72 sts). Do not fasten off.
Squaring Off (Rounds 13–14)
Rnd 13 (A): ch 3 (counts as first dc), dc in same st, dc in next 8 sts, 3 dc in next st (corner), *dc in next 17 sts, 3 dc in next st; rep from * 2 more times, dc in next 8 sts, join with sl st to top of ch-3 (80 dc).
Rnd 14 (A): ch 1, sc in each dc around, working 3 sc in each corner st, join with sl st to first sc. Fasten off.
Assembly and Finishing
Weave in all ends on the wrong side with your tapestry needle, working each tail through a few stitches in its own color so it disappears. There is no seaming — this is a single flat piece. To block, mist the square lightly with water, pin it out to 6" x 6" (15 x 15 cm) on a blocking mat, nudging the corners square, and let it dry completely. Blocking is what gives the mandala its crisp, flat finish and even edges.
Pro Tips and Variations
- Change the palette: swap lavender and cream for any two-color contrast, or work the whole mandala in one color for a subtle textured look.
- Make a set: work several squares in alternating color orders and join them into a pillow front, tote panel, or small blanket.
- Add a hanging loop: after Round 14, ch 10 and sl st back to the same stitch to create a small loop for an ornament or wall hanging.