Mini Pineapple Charm Free Crochet Pattern
Introduction
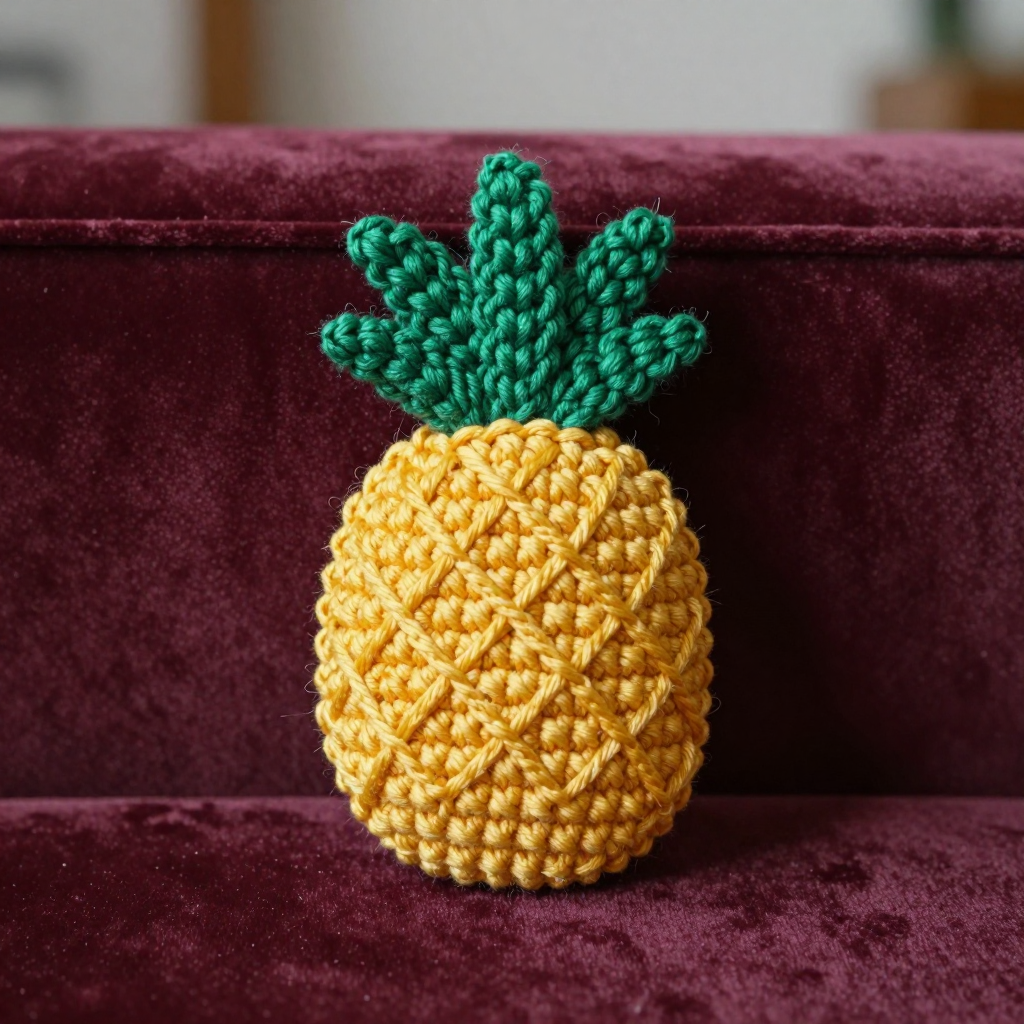
This tiny pineapple charm is the perfect little project for anyone who wants a quick, cheerful make that uses almost no thread at all. Worked in fine cotton thread with a small steel hook, it comes together in a single sitting and looks adorable as a bag charm, a summer ornament, or a pair of statement earrings. The rounded golden body is finished with a crosshatch of surface slip stitches that gives it that classic pineapple diamond texture, and three little green chain loops stand up on top as a leafy crown. It measures about 2 inches long including the crown, so it feels light and delicate in the hand while still holding its shape beautifully.
Materials Needed
- Yarn: Size 10 crochet thread, 100% cotton — about 15 yards golden yellow (Color A) and 5 yards green (Color B).
- Hook: 1.5 mm steel hook (US 8).
- Notions: Tapestry or embroidery needle for weaving in ends, small sharp scissors, and a stitch marker (optional) for marking the start of the round.
- Finished size: Approx. 2 inches (5 cm) long including the crown; body diameter approx. 1 inch after Round 4.
Abbreviations
- MR — magic ring: an adjustable loop you work your first stitches into, then pull closed.
- sc — single crochet: insert hook, pull up a loop, yarn over, pull through both loops.
- inc — increase: work 2 single crochet stitches into the same stitch.
- dec — decrease: work 2 stitches together into one (single crochet 2 together).
- sl st — slip stitch: insert hook, yarn over, pull through both the stitch and the loop on your hook.
- ch — chain: yarn over and pull through the loop on your hook.
- sts — stitches.
- Rnd — round: one complete circle of the work.
Gauge
Gauge is not crucial for this small charm, but the body should measure approximately 1 inch in diameter after Round 4. To check, work Rounds 1–4 and lay the piece flat; if it is much larger or smaller than 1 inch across, adjust your hook size up or down slightly.
Tips Before You Start
- Work tightly and evenly so the body holds a firm, rounded shape — thread work shows any looseness.
- Use a stitch marker in the first stitch of each round; with such small rounds it is easy to lose your place.
- Keep your tension on the surface slip stitches loose enough that they sit on top of the body without pulling it out of shape.
- Leave a 6-inch tail at the start and end so you have plenty of thread to weave in and to attach your charm hardware later.
Step-by-Step Instructions
Body (Color A)
Rnd 1: Make a magic ring, work 6 sc into the ring (6 sts). Pull the ring closed.
Rnd 2: inc in each st around (12 sts).
Rnd 3: [sc, inc] x6 (18 sts).
Rnd 4: [sc, inc] x6 (24 sts). Body diameter is now approx. 1 inch.
Rnds 5–8: sc in each st around (24 sts).
Rnd 9: [sc, dec] x6 (18 sts).
Rnd 10: [sc, dec] x6 (12 sts).
Rnd 11: dec x6 (6 sts).
Fasten off, leaving a tail. Thread the tail onto your needle and weave it through the front loops of the last 6 sts, then pull gently to close the top. Weave the tail inside the body.
Crosshatch (Color A)
Work these surface slip stitches on the outside of the finished body, using the golden yellow thread.
Line 1: Join A at the lower right side of the body. Working diagonally up toward the top left, work 3 sl sts spaced evenly across the body surface.
Line 2: Join A at the lower left side. Working diagonally up toward the top right, work 3 sl sts spaced evenly, crossing over Line 1.
Repeat: Repeat Lines 1 and 2 to create 2–3 crosshatch intersections in total, spacing them evenly around the body. Fasten off and weave in ends.
Crown (Color B)
Join B at the top center of the body.
Loop 1: Ch 5, sl st in the same st (loop 1 made).
Loop 2: Ch 5, sl st in the next st (loop 2 made).
Loop 3: Ch 5, sl st in the next st (loop 3 made).
Fasten off and weave in ends.
Assembly and Finishing
There are no separate pieces to seam — the charm is worked in one body with the crosshatch and crown added directly onto it. Weave in all remaining ends on the wrong side, running each tail through a few stitches before trimming so it stays secure. To block, mist the charm lightly with water, pin it flat into a neat oval shape on a foam mat, and let it dry completely; this opens up the crosshatch and helps the crown loops stand upright. If you plan to wear it as an earring or charm, attach your hardware to the top of the body just below the crown after blocking.
Pro Tips and Variations
- Color play: Swap the golden yellow for a variegated thread, or use a deeper orange for a riper-looking pineapple.
- Bigger charm: Hold two strands of size 10 thread together with a 2.5 mm hook for a chunkier keychain version.
- Extra texture: Add a fourth crosshatch line or a tiny embroidered dot in each diamond for a more detailed, boutique look.