Olive and Ochre Striped Floor Pouf Knit Free Pattern
Introduction
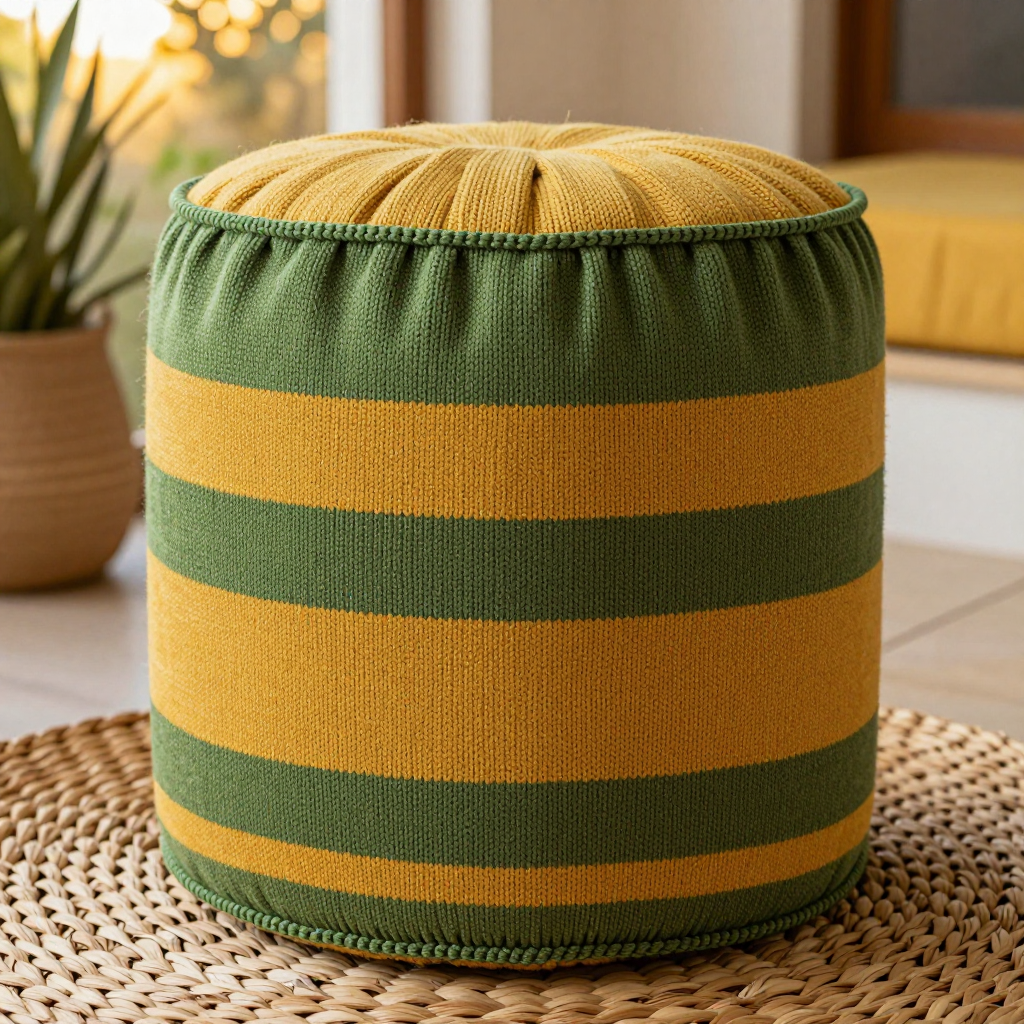
This Olive and Ochre Striped Floor Pouf is a cheerful, retro-inspired drum cushion that brings a little 90s warmth to any room. It is designed for beginners who can knit and purl, because the whole body is just one flat rectangle worked in smooth stockinette with wide, bold stripes. The finished pouf looks plump and rounded, about 50 cm across and 35 cm tall, with a soft, firm surface that is comfortable underfoot and inviting to sit on. The olive and ochre bands feel earthy yet playful, and the gathered top and bottom give it that classic puckered drum shape.
Materials Needed
- Yarn: Aran weight wool blend (approx. 20% wool, 80% acrylic), in two colors:
- Color A (Olive): approx. 380 yd / 350 m
- Color B (Ochre): approx. 380 yd / 350 m
- Needles: 5.0 mm (US 8) straight needles, 80 cm / 32 in length
- Notions: Tapestry needle, strong yarn or heavy-duty thread for gathering, polyester fiberfill or a 50 cm / 20 in round cushion insert, scissors, measuring tape
- Finished size: Approx. 50 cm / 20 in diameter x 35 cm / 14 in tall
Abbreviations
- st(s): stitch(es)
- CO: cast on
- BO: bind off
- k: knit
- p: purl
- st st: stockinette stitch — knit on right-side rows, purl on wrong-side rows
- RS: right side
- WS: wrong side
- A: Olive
- B: Ochre
Gauge
16 sts x 22 rows = 10 x 10 cm / 4 x 4 in in stockinette stitch, blocked. Knit a small swatch in stockinette, block it, and measure a 10 cm section to check your stitch and row counts before starting.
Tips Before You Start
- Change colors at the edge: Since the panel is worked flat, change from A to B (and back) at the beginning of a row so the color joins stay hidden in the side seam.
- Keep the stripes even: Each color band is exactly 20 rows. Use a row counter or tick marks on paper so you never lose track of which band you are in.
- Bind off loosely: A tight bind-off makes the top gather puckered unevenly. Use a needle one size larger for the bind-off if you tend to work tightly.
- Stuff firmly and evenly: Fill the pouf in small handfuls, pushing filling into the edges first, so the drum keeps a round, even silhouette.
Step-by-Step Instructions
Striped Panel (make 1)
Worked flat in stockinette stitch (knit on RS rows, purl on WS rows), with a garter border at each short end.
With A, CO 80 sts.
Rows 1-4: k all sts (garter border) (80 sts)
Rows 5-24: st st in A (20 rows) (80 sts)
Change to B.
Rows 25-44: st st in B (20 rows) (80 sts)
Change to A.
Rows 45-64: st st in A (20 rows) (80 sts)
Change to B.
Rows 65-84: st st in B (20 rows) (80 sts)
Change to A.
Rows 85-104: st st in A (20 rows) (80 sts)
Change to B.
Rows 105-124: st st in B (20 rows) (80 sts)
Change to A.
Rows 125-144: st st in A (20 rows) (80 sts)
Change to B.
Rows 145-164: st st in B (20 rows) (80 sts)
Change to A.
Rows 165-168: k all sts (garter border) (80 sts)
BO all 80 sts loosely.
Finished panel measures approx. 50 cm wide x 35 cm tall.
Seaming the Tube
Fold the panel in half widthwise with RS together, matching the cast-on edge to the bind-off edge. Using mattress stitch, seam the two side edges together to form a tube, leaving both short ends (top and bottom openings) open. Turn the tube RS out.
Top Gather
Thread a length of strong yarn or heavy-duty thread onto a tapestry needle. Working around the top opening, pass the needle through every bind-off stitch, then pull the yarn tight to close the opening. Secure firmly with a few stitches and knot.
Stuffing
Insert polyester fiberfill or a 50 cm / 20 in round cushion insert through the bottom opening. Fill firmly and evenly, adding small handfuls and pushing filling toward the edges first so the drum shape stays round.
Bottom Gather
Thread strong yarn through every cast-on stitch around the bottom opening, pull tight to close, and secure firmly. Adjust the filling through the small remaining gap if needed before the final knot.
Assembly and Finishing
Weave in all remaining ends on the wrong side, working them along the stripes so they blend in. Lightly block the finished pouf to shape the drum: mist with water, pat into a round cylinder, and let it dry fully, turning it once so both ends dry evenly. Fluff and reshape the filling by hand after blocking so the pouf sits plump and even.
Pro Tips and Variations
- Change the palette: Swap olive and ochre for mustard and rust, or cream and sage, to match your room while keeping the same stripe rhythm.
- Add a base: Sew a circle of non-slip fabric or a knitted disc to the bottom before gathering for extra grip on smooth floors.
- Make it firmer: Use a round cushion insert instead of loose fiberfill for a denser, more structured pouf that holds its drum shape longer.