Snowy Birch Tree Ornament Pouch Free Crochet Pattern
Snowy Birch Tree Ornament Pouch Free Crochet Pattern
Introduction
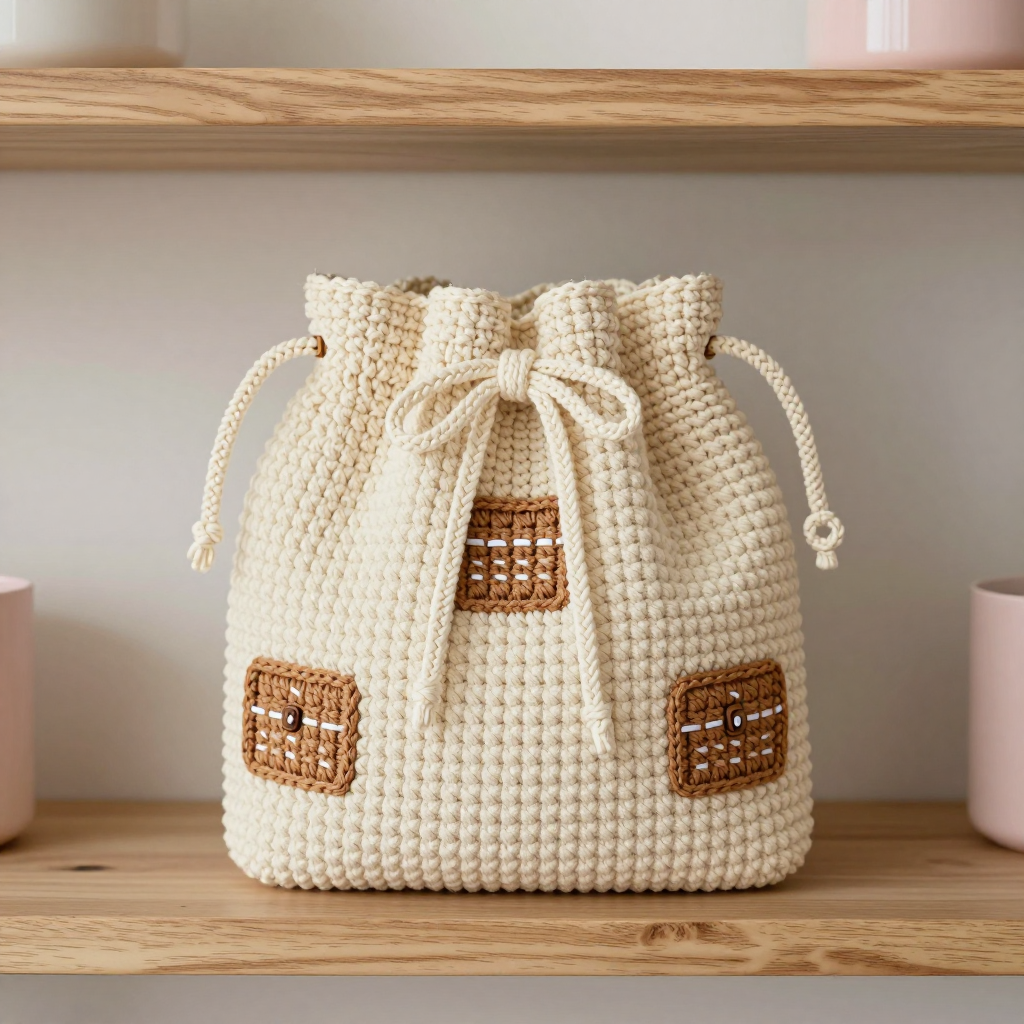
This little Snowy Birch Tree Ornament Pouch is a cozy, beginner-friendly project that works up in an afternoon and makes the sweetest little gift bag. It's crocheted in soft worsted-weight cream yarn, then dressed up with three light brown birch trunk appliqués and tiny white stitches that mimic snowy bark. The finished pouch is about 4 inches wide and 5 inches tall, with a drawstring bow and a small hanging loop so it can dangle from a tree, a hook, or a gift basket. It feels smooth and squishy in single crochet and is just the right size for holding a small ornament, a piece of jewelry, or a handful of candy.
Materials Needed
- Yarn: Worsted weight (4) acrylic yarn — 50 yds cream (A), 10 yds light brown (B), 5 yds dark brown (C), 5 yds white (D)
- Hook: 5.0 mm (H-8) crochet hook
- Notions: Tapestry needle, scissors, stitch marker (optional), a small amount of polyester fiberfill or a small gift to fill the pouch
- Finished size: 4 inches wide x 5 inches tall, excluding the hanging loop
Abbreviations
- ch — chain: make a loop of yarn and pull it through the loop on your hook.
- sc — single crochet: insert hook, yarn over, pull up a loop, yarn over, pull through both loops.
- sl st — slip stitch: insert hook, yarn over, pull through both the loop and the stitch on your hook.
- inc — increase: work 2 single crochet into the same stitch.
- dec — decrease: work 2 single crochet together to make one stitch.
- MR — magic ring: an adjustable loop used to start working in the round.
- FO — fasten off: cut the yarn and pull the tail through the last loop.
- sts — stitches.
- rnd(s) — round(s).
Gauge
16 sc x 18 rnds = 4 inches. To check, crochet a small swatch in single crochet in the round and measure a 4-inch section; adjust your hook size if your stitches are much larger or smaller than this.
Tips Before You Start
- Use a stitch marker at the start of each round — the pouch is worked in continuous rounds, so the beginning of the round can drift.
- Keep your single crochet even and snug; loose stitches will make the drawstring holes gap open.
- Work the trunk appliqués first so they're ready to sew on once the pouch is finished.
- When embroidering the birch bark, use short, slightly uneven stitches — real birch bark is irregular, so imperfection looks better.
Step-by-Step Instructions
Pouch (A)
Worked in continuous rounds; do not join or turn unless noted.
Rnd 1: MR, 6 sc into the ring (6 sts).
Rnd 2: inc x6 (12 sts).
Rnd 3: [sc, inc] x6 (18 sts).
Rnd 4: [2 sc, inc] x6 (24 sts).
Rnd 5: [3 sc, inc] x6 (30 sts).
Rnds 6–20: sc in each st around (30 sts).
Rnd 21: [3 sc, dec] x6 (24 sts).
Rnd 22: [2 sc, dec] x6 (18 sts).
Rnd 23: [sc, dec] x6 (12 sts).
Rnd 24: dec x6 (6 sts). FO, weave in tail.
Drawstring (A)
Row 1: Ch 50, sl st in each ch across (50 sts). FO, weave in ends.
Hanging Loop (A)
Row 1: Ch 10, sl st in each ch across (10 sts). FO, leave a 6" tail for sewing.
Trunk Appliqué (make 3, B)
Row 1: Ch 6, sc in 2nd ch from hook and in each ch across (5 sts).
Rows 2–8: sc in each st across (5 sts). FO, leave an 8" tail for sewing.
Branch Stitches (D)
Using white yarn and a tapestry needle, embroider small straight stitches on each trunk: 3–4 short horizontal lines spaced evenly down the trunk, plus a few tiny vertical dashes to mimic birch bark.
Edging (optional, A)
Join A at the top edge of the pouch, sc evenly around the opening (about 30 sc). FO and weave in ends.
Assembly and Finishing
Sew the three trunks evenly spaced around the pouch, about 1 inch apart, using the B tails. Sew the hanging loop to the top edge of the pouch at the back. Thread the drawstring through Rnd 20 (or between Rnds 20 and 21) using a tapestry needle, going in and out every 2 stitches. Tie the ends in a bow at the front. Weave in all remaining ends. Lightly steam or mist block the pouch and trunks, shaping the pouch into a rounded bag and pressing the appliqués flat; let dry completely before filling.
Pro Tips and Variations
- Swap the cream for pale gray or soft blue for a frostier winter look.
- Add a tiny red or green bead to the drawstring bow for a festive accent.
- Make a set in different sizes by adding or removing straight rounds between Rnds 6 and 20 — each extra round adds about ¼ inch of height.