Caramel Square Sun Visor Crochet Free Pattern
Caramel Square Sun Visor Crochet Free Pattern
Introduction
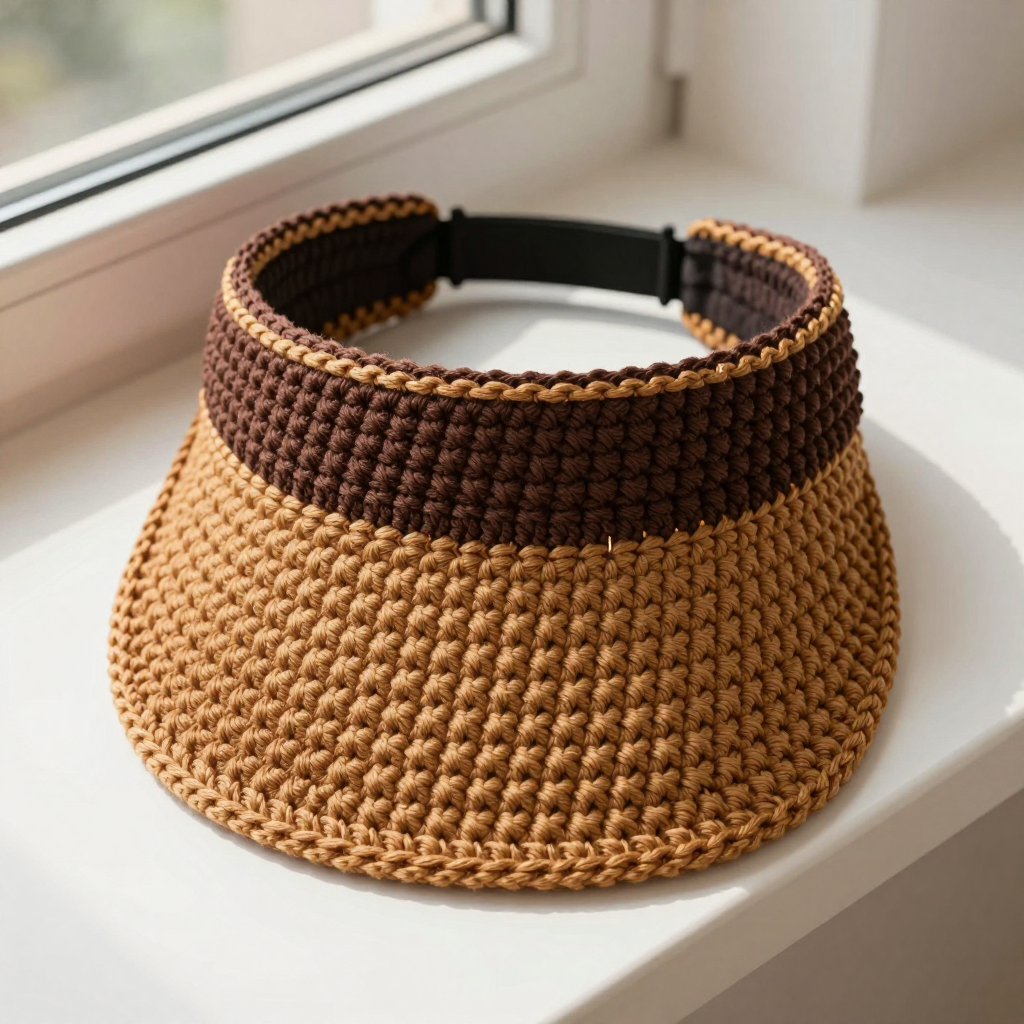
This open-top sun visor is the perfect first project for anyone who wants a wearable that actually looks like streetwear. A chocolate single crochet band hugs the head, while a solid caramel granny square sits at the front to shade your eyes and give the whole piece a clean, two-tone finish. It is light and airy because the top of the head stays open, so it works beautifully on warm days and never flattens your hair. Beginner-friendly and quick to make, it is a great stash-buster and a fun way to practice working in the round and seaming a flat panel to a tube.
Materials Needed
- Yarn: Worsted weight (category 4) acrylic, approx. 120 yd total — Color A (chocolate) 80 yd, Color B (caramel) 40 yd
- Hook: 5.0 mm (US H-8)
- Notions: Stitch marker, tapestry needle, scissors, rust-proof pins
- Finished size: Band circumference 21.5 in (55 cm) unstretched, fits 21–23 in (53–58 cm) head; band height 3 in (7.5 cm); visor panel 6 x 6 in (15 x 15 cm), projecting approx. 4 in (10 cm) from the band front
Abbreviations
- ch — chain: yarn over and pull through the loop on your hook
- sl st — slip stitch: insert hook, yarn over, pull through both the stitch and the loop on your hook
- sc — single crochet: insert hook, yarn over, pull up a loop, yarn over, pull through both loops
- dc — double crochet: yarn over, insert hook, pull up a loop, yarn over and pull through two loops twice
- MR — magic ring: an adjustable loop you crochet into, then pull closed
- sp — space: the gap made by a chain or chains
- rep — repeat
- sts — stitches
Gauge
14 sc x 16 rows = 4 in (10 cm) in single crochet, and granny square Rounds 1–4 = 4 in (10 cm) square. Work a small swatch in sc and a test square, then measure the middle of each; if your stitches are larger than the gauge, go down a hook size, and if smaller, go up.
Tips Before You Start
- When you join the starting chain into a ring, check carefully that it is not twisted — a twist here cannot be fixed later and will show at the band.
- Use a stitch marker at the start of each band round so you never lose your place in the long, plain sc rounds.
- Keep your sc tension even but not tight; the band should stretch gently to fit without leaving marks on the forehead.
- Pin the square in place and try the visor on before stitching, so you can adjust how far the panel projects forward.
Step-by-Step Instructions
Band (Color A — chocolate)
Set-up: Ch 76, join with sl st to first ch, being careful not to twist (76 sts).
Rnds 1–12: Sc in each st around (76 sts).
Fasten off and weave in ends. The band measures approx. 21.5 in around x 3 in high.
Visor Square (Color B — caramel)
Set-up: Make a magic ring (MR).
Rnd 1: Ch 3 (counts as dc), 2 dc in ring, ch 2, [3 dc, ch 2] x3, join with sl st to top of ch-3 (12 dc, 4 ch-2 sps).
Rnd 2: Ch 3, dc in each dc to next ch-2 sp, *[2 dc, ch 2, 2 dc] in ch-2 sp, dc in each dc to next ch-2 sp; rep from * around, join (28 dc, 4 ch-2 sps).
Rnd 3: Ch 3, dc in each dc to next ch-2 sp, *[2 dc, ch 2, 2 dc] in ch-2 sp, dc in each dc to next ch-2 sp; rep from * around, join (44 dc, 4 ch-2 sps).
Rnd 4: Ch 3, dc in each dc to next ch-2 sp, *[2 dc, ch 2, 2 dc] in ch-2 sp, dc in each dc to next ch-2 sp; rep from * around, join (60 dc, 4 ch-2 sps).
Fasten off leaving a 24 in tail. The square measures approx. 6 x 6 in.
Assembly
Fold the band flat to mark the front center. Pin one edge of the square to the band front with the square centered on the front center line, and the lower edge of the square overlapping the band's top edge by 0.5 in. Whip stitch the square to the band along the overlap using the Color B tail, working through both layers. Weave in ends.
Edging (Color B — caramel)
Join B with a sl st at the band back seam. Sc evenly around the top edge of the band only, skipping the stitches covered by the square (approx. 60 sc). Sl st to first sc. Fasten off and weave in ends.
Assembly and Finishing
If you have not already done so, whip stitch the square to the band along the 0.5 in overlap, keeping your stitches small and even so the join lies flat. Weave in all remaining ends on the wrong side, threading each tail through a few stitches before trimming. Block lightly to shape the visor: mist the band and square with water, pin the square flat and the band into its round shape, and let it dry completely before wearing.
Pro Tips and Variations
- Work the square in a cotton or cotton-blend yarn for a crisper, more structured visor panel that holds its shape in the sun.
- Swap the solid square for a classic open granny square (ch-1 spaces between dc groups) for a lighter, lacier look.
- Add a contrast sc round in Color A around the outer edge of the square before seaming for a bold outlined finish.