Mauve Crown, Plum Brim Bucket Hat Free Crochet Pattern
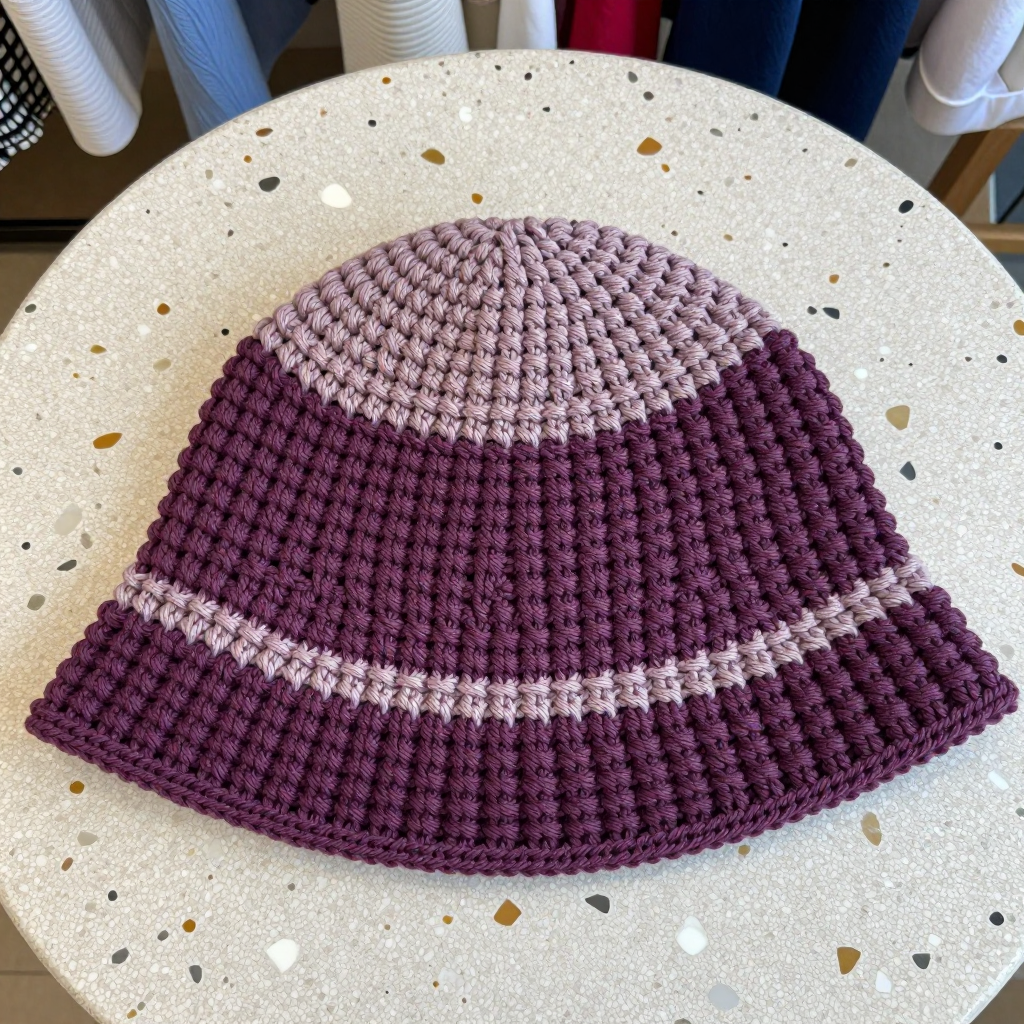
Mauve Crown, Plum Brim Bucket Hat Free Crochet Pattern
Introduction
This teen-sized bucket hat pairs a flat mauve crown with plum sides and a gently flared brim, and it is a wonderful first hat project for anyone comfortable with half double crochet. The sides are worked in back-loop half double crochet, which gives the hat a soft ribbed texture that catches the light and makes the stepped brim stand out. The two-tone color blocking in dusty mauve and deep plum gives it an easy dark academia feel that suits autumn walks, school days, and everything in between. Worked in worsted weight cotton, it holds its shape nicely while staying breathable and comfortable against the head.
Materials Needed
- Yarn: Worsted weight cotton (category 4) — approximately 150 yards mauve and 100 yards plum
- Hook: 5.0 mm (H-8) crochet hook
- Notions: Stitch marker, tapestry needle, scissors, tape measure
- Finished size: Circumference 21 inches (53 cm), height 7 inches (18 cm) including brim — teen size
Abbreviations
- MR: magic ring — an adjustable loop used to start working in the round
- hdc: half double crochet
- sc: single crochet
- st(s): stitch(es)
- Rnd: round
- BLO: back loop only — work into the loop farthest from you
- [ ] x8: repeat the instructions inside the brackets 8 times
Gauge
14 hdc x 12 rows = 4 inches (10 cm) in back-loop hdc. Work a small swatch in back-loop hdc and measure the center of it; if you have more stitches than 14 in 4 inches, go up a hook size, and if you have fewer, go down.
Tips Before You Start
- Mark the first stitch of each round with a stitch marker — the hat is worked in continuous rounds, so the beginning can drift.
- Keep your tension even on the crown increases; a slightly loose crown lies flatter, while a tight one will cup.
- Change to plum at the very end of Rnd 10, finishing the last hdc with the new color so the color change sits cleanly at the ridge.
- Work Rnd 11 into the back loops only — this is what creates the crisp horizontal ridge between crown and sides.
Step-by-Step Instructions
Crown (Mauve)
Rnd 1: MR, 8 hdc into the ring (8 sts).
Rnd 2: 2 hdc in each st around (16 sts).
Rnd 3: [hdc, 2 hdc in next st] x8 (24 sts).
Rnd 4: [2 hdc, 2 hdc in next st] x8 (32 sts).
Rnd 5: [3 hdc, 2 hdc in next st] x8 (40 sts).
Rnd 6: [4 hdc, 2 hdc in next st] x8 (48 sts).
Rnd 7: [5 hdc, 2 hdc in next st] x8 (56 sts).
Rnd 8: [6 hdc, 2 hdc in next st] x8 (64 sts).
Rnd 9: [7 hdc, 2 hdc in next st] x8 (72 sts).
Rnd 10: [8 hdc, 2 hdc in next st] x8 (80 sts). Do not fasten off. Change to plum.
Sides (Plum)
Rnd 11: Working in back loops only, hdc in each st around (80 sts).
Rnds 12–20: Hdc in each st around (80 sts).
Brim (Plum)
Rnd 21: Hdc in each st around (80 sts).
Rnd 22: [9 hdc, 2 hdc in next st] x8 (88 sts).
Rnds 23–24: Hdc in each st around (88 sts).
Rnd 25: [10 hdc, 2 hdc in next st] x8 (96 sts).
Rnds 26–27: Hdc in each st around (96 sts).
Rnd 28: Sc in each st around (96 sts). Fasten off.
Assembly and Finishing
There is no seaming — the hat is worked in one continuous piece from crown to brim. Weave in all ends on the inside of the hat, running each tail through several stitches in two directions so it stays secure. Block lightly by misting the hat with water and smoothing the crown flat and the brim into an even circle over a bowl or hat form; let it dry fully. Light blocking is all that is needed to shape the brim.
Pro Tips and Variations
- For a slouchier look, add a few extra plain hdc rounds to the sides before starting the brim.
- Swap the colors for a classic solid hat, or add a third color for a striped brim.
- Work the final sc round in a contrasting shade for a crisp, defined edge.


