Staggered Granny Eye Column Crochet Free Pattern
Introduction
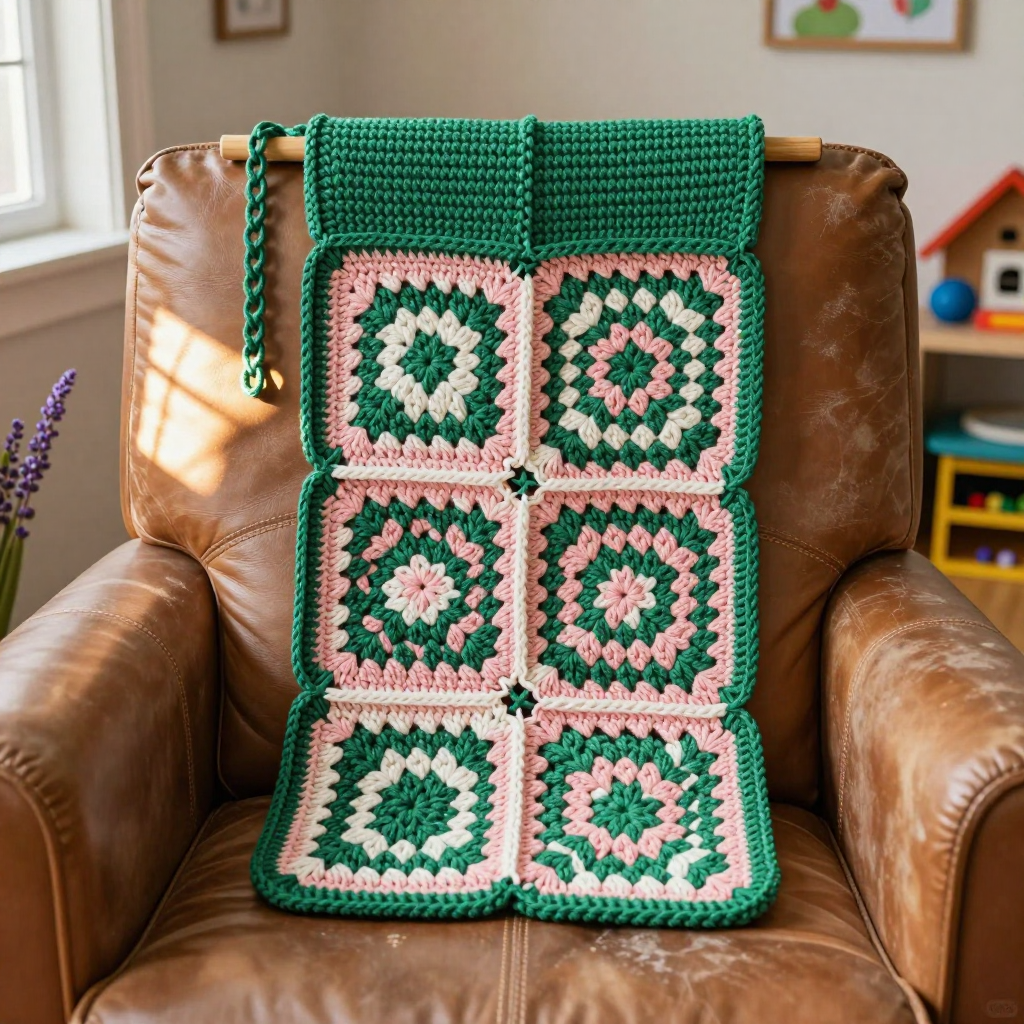
This Staggered Granny Eye Column is a calm, minimalist wall hanging that anyone can make, even if you have only just learned to crochet in the round. It is built from four solid granny squares, each with a small "evil eye" center, worked in alternating emerald and blush rings so the colors shift like ripples in a pool. The squares are joined into a single vertical strip, edged in emerald, and folded over a dowel with a simple chain loop for hanging. The finished piece is about 8 inches wide and 32 inches long, light and flat, and it looks lovely on a narrow wall, beside a door, or above a small shelf.
Materials Needed
- Yarn: Worsted weight acrylic. Emerald (A): 120 yards. Blush (B): 120 yards. White (C): 20 yards.
- Hook: 5.0 mm (H-8) crochet hook.
- Notions: Tapestry needle, scissors, stitch marker, measuring tape, 10-inch (25 cm) wooden dowel (about 1/4 inch thick).
- Finished size: Approx. 8 inches (20 cm) wide by 32 inches (81 cm) long, excluding the hanging chain.
Abbreviations
- MR – magic ring: an adjustable loop you crochet into, then pull closed.
- sc – single crochet.
- inc – increase: work 2 single crochet into the same stitch.
- ch – chain.
- sl st – slip stitch.
- sts – stitches.
- [ ] x6 – repeat everything inside the brackets six times.
Gauge
One round of the solid granny square equals 1 inch (2.5 cm) square after round 4. To check, work rounds 1–4 of Square 1 and measure the small square; it should be about 1 inch across. If it is larger, go down a hook size; if smaller, go up a hook size.
Tips Before You Start
- Keep your tension even and slightly firm so the squares stay flat; loose single crochet makes the corners curl.
- Change colors on the last pull-through of the final stitch of a round so the new color starts cleanly.
- Count your stitches at the end of every round; each round adds exactly 6 stitches.
- Leave yarn tails of at least 4 inches so you can weave them in securely at the end.
Step-by-Step Instructions
Square 1 (Eye A, B) – make 2
Rnd 1: With A, work 6 sc into a magic ring (6 sts). Pull the ring closed.
Rnd 2: inc in each st around (12 sts).
Rnd 3: [sc, inc] x6 (18 sts).
Rnd 4: [2 sc, inc] x6 (24 sts). Change to B.
Rnd 5: [3 sc, inc] x6 (30 sts). Change to A.
Rnd 6: [4 sc, inc] x6 (36 sts). Change to B.
Rnd 7: [5 sc, inc] x6 (42 sts). Change to A.
Rnd 8: [6 sc, inc] x6 (48 sts). Change to B.
Rnd 9: [7 sc, inc] x6 (54 sts). Change to A.
Rnd 10: [8 sc, inc] x6 (60 sts). Fasten off.
Square measures approx. 4 inches (10 cm).
Square 2 (Eye B, A) – make 2
Work as Square 1, but start with B and alternate colors: Rounds 1–4 in B, Round 5 in A, Round 6 in B, Round 7 in A, Round 8 in B, Round 9 in A, Round 10 in B. Fasten off. Square measures approx. 4 inches (10 cm).
Assembly
Arrange the squares vertically in alternating order: Square 1, Square 2, Square 1, Square 2. With right sides facing, join the squares using whipstitch through the back loops only, working across the top edge of one square and the bottom edge of the next. Join all four squares into a single strip.
Edging
With A, join yarn at any corner of the strip. Work sc evenly around the entire perimeter, working 3 sc in each corner. Fasten off and weave in ends.
Hanging
Cut the dowel to 10 inches (25 cm). Fold the strip over the dowel at the top edge and sew it in place with A, creating a 1-inch (2.5 cm) sleeve. With A, attach yarn to the left end of the dowel, ch 30, and sl st to the right end of the dowel to form the hanging loop. Fasten off and weave in ends.
Assembly and Finishing
Check that all four squares are joined in the correct alternating order and that the seams sit flat. Weave in every remaining yarn tail on the wrong side, working each tail through several stitches before trimming. Block the hanging lightly: mist it with water, pin it flat to a towel or blocking mat, and let it dry completely so the squares lie straight. Once dry, slide the dowel through the sleeve and hang.
Pro Tips and Variations
- Swap the emerald and blush for any two colors you love; keep the white center for contrast.
- Make a shorter version with two squares for a small wall accent, or a longer one with six squares for a tall column.
- Add a small tassel to each end of the dowel for a boho touch, or leave it plain for a clean minimalist look.