Square Tweed Shoulder Wrap: Free Crochet Pattern
Square Tweed Shoulder Wrap: Free Crochet Pattern
Introduction
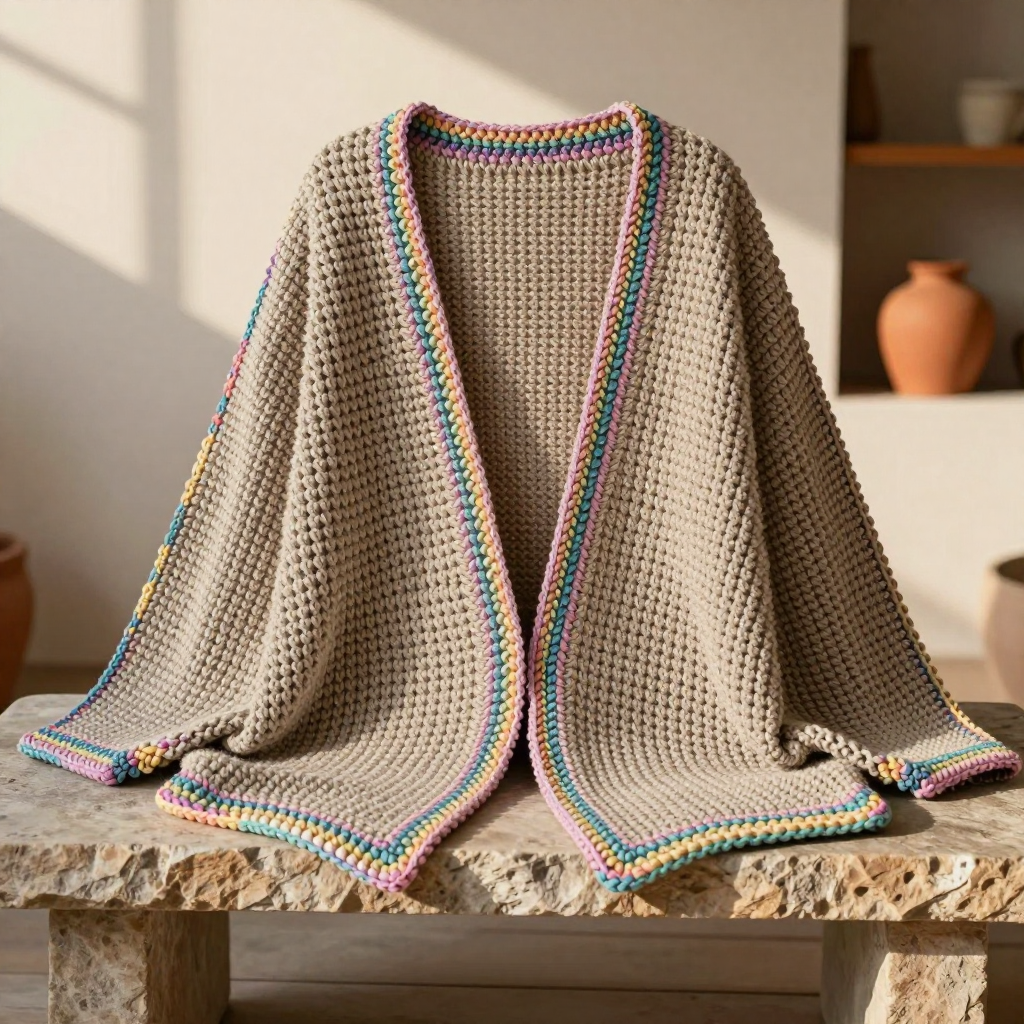
This beginner-friendly shrug is made from just two flat squares, so you never have to shape a curve or work in the round until the very end. Each square is worked in alpine stitch, a simple two-row repeat of front-post double crochet and plain double crochet that builds a raised, vertical grid across the fabric. The tweed wool gives it a modern, slightly space-age texture, and the bold pastel border in a contrast color frames every edge and seam. The finished wrap sits softly over the shoulders, crosses at the front, and feels light and warm at the same time.
Materials Needed
- Yarn: Worsted weight tweed wool (approx. 200–220 yds per 100 g skein). Color A (main): 400 yds. Color B (border): 150 yds.
- Hook: 5.5 mm (US I-9) crochet hook.
- Notions: Stitch markers, a yarn needle for seaming and weaving in ends, and scissors.
- Finished size: Each square is 20 inches x 20 inches. Finished shrug is 40 inches wide across the back and 20 inches long from shoulder to hem, fitting bust 32–44 inches.
Abbreviations
- ch — chain: make a loop of yarn and pull it through the loop on your hook.
- dc — double crochet: yarn over, insert hook in stitch, pull up a loop, yarn over and pull through two loops, yarn over and pull through the last two loops.
- fpdc — front-post double crochet: work a double crochet around the post (the vertical body) of the stitch below, from the front, instead of into the top of the stitch.
- sc — single crochet: insert hook in stitch, pull up a loop, yarn over and pull through both loops.
- sl st — slip stitch: insert hook in stitch, yarn over and pull through both the stitch and the loop on your hook.
- st(s) — stitch(es).
- rep — repeat.
- WS — wrong side (the back face of the fabric).
Gauge
14 sts x 8 rows = 4 inches in alpine stitch pattern. Work a small swatch in the pattern and measure a 4-inch section in the middle; if you have more stitches than 14, go up a hook size, and if you have fewer, go down.
Tips Before You Start
- Count your stitches at the end of every row. Both squares must be identical in size for the seams to line up.
- Keep your front-post double crochets loose enough to sit flat; pulling them tight makes the grid pucker.
- Mark the first stitch of each row with a stitch marker so you never lose the edge stitch.
- Work both squares before you begin the border so you can compare them side by side.
Step-by-Step Instructions
Square (make 2, with Color A)
Row 1: Ch 71. Dc in 4th ch from hook and in each ch across (69 dc). Turn.
Row 2: Ch 2, *fpdc in next st, dc in next st; rep from * to last st, fpdc in last st (69 sts). Turn.
Row 3: Ch 2, dc in each st across (69 dc). Turn.
Rows 4–40: Rep Rows 2–3, ending with Row 3 (69 sts). Fasten off.
Border (with Color B)
Join B to any corner of one square. Work sc evenly around the entire square, working 3 sc in each corner. Join with sl st to first sc. Fasten off. Rep for the second square.
Assembly
Place the squares side by side with WS facing up. Join B at the bottom right corner of the left square. Sc the squares together along the right side of the left square and the left side of the right square, from bottom to top (back seam). Fasten off.
Fold each square in half vertically (right sides together) so the top edges meet at the center back. The back seam is now at the center back. Join B at the top of the back seam. Sc the top edges of the two squares together from center back to the outer edge on each side (shoulder seams), leaving the armholes open (approx. 7 inches from the outer edge). Fasten off.
Armhole Edging (with Color B)
Join B at the underarm. Work sc evenly around the armhole, join with sl st to first sc. Fasten off. Rep for the other armhole.
Bottom Edging (with Color B)
Join B at the bottom edge. Work sc evenly around the bottom edge, join with sl st to first sc. Fasten off.
Assembly and Finishing
Weave in all ends on the wrong side with your yarn needle, working them through several stitches so they stay secure. Gently block the finished shrug: mist it lightly with water, pat the squares flat, and let it dry fully so the alpine stitch grid relaxes and the seams sit straight. Check that both armholes are even and that the front panels cross comfortably before you wear it.
Pro Tips and Variations
- Swap the pastel border for a deep jewel tone to make the tweed texture pop even more.
- Add a second sc round in Color B around the armholes and bottom edge for a thicker, more defined finish.
- Make a longer version by adding rows to both squares before the border; just keep the stitch count at 69 and add the same number of rows to each square.