Ribbed Patch Towel + Potholder Duo Free Knit Pattern
Introduction
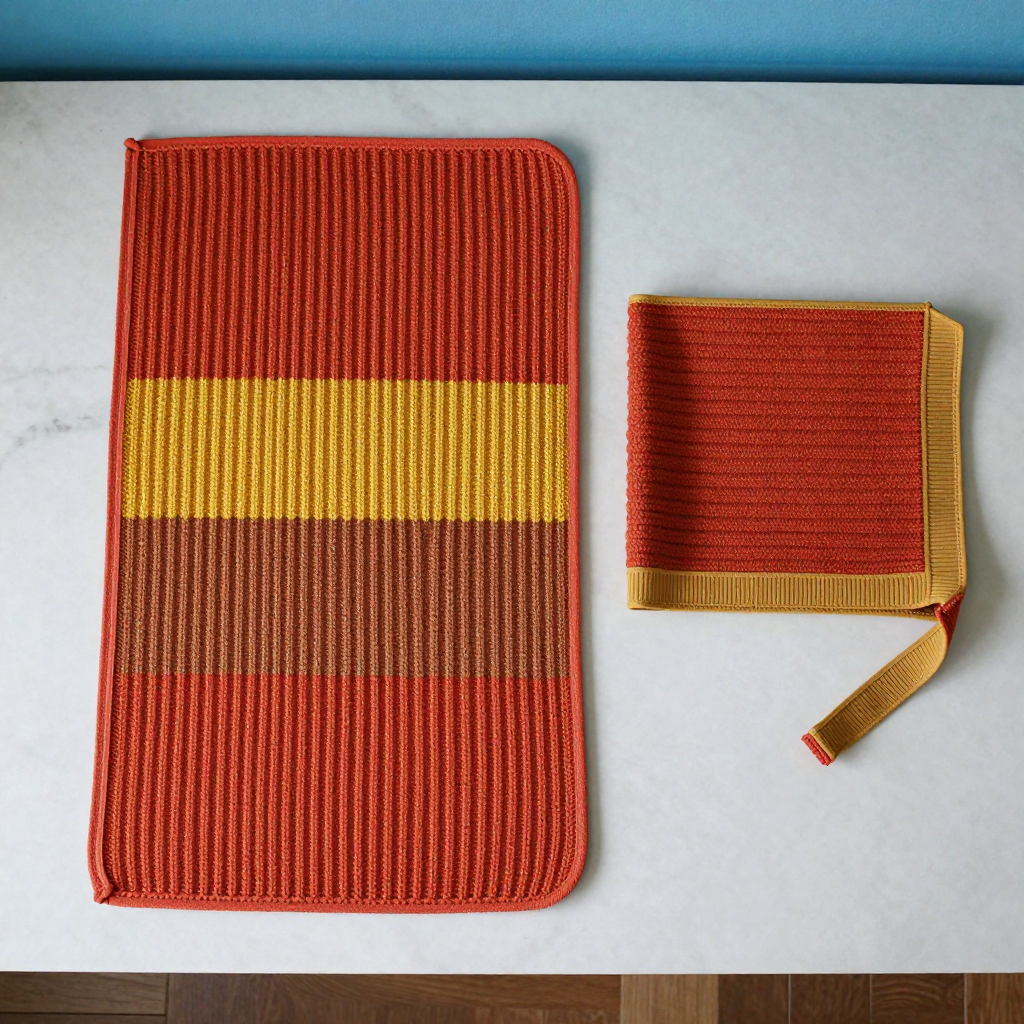
This cozy duo is made for anyone who wants a quick, satisfying knit that looks handmade in the best way. A flat 1x1 ribbed hand towel with three bold spice-colored stripes is paired with a matching ribbed square potholder that hangs from a corner loop. Knit in soft velvet yarn, both pieces have a plush, velvety texture and a warm folk-art feel that suits a Thanksgiving kitchen or everyday farmhouse decor. There is no shaping, no complicated stitchwork, and only knit and purl stitches, so it is a wonderful first color-blocking project.
Materials Needed
- Yarn: Worsted weight velvet yarn (100% polyester, approx. 150 yards per 100g skein). Color A (Paprika): 150 yards; Color B (Saffron): 100 yards; Color C (Cinnamon): 100 yards; Color D (Nutmeg): 50 yards.
- Needles: 5.0 mm (US 8) straight needles.
- Notions: Tapestry needle, scissors, tape measure, blocking pins and a spray bottle or blocking mat.
- Finished size: Towel: 10 inches wide x 16 inches long. Potholder: 7 inches square.
Abbreviations
- CO: cast on — create the first row of stitches on your needle.
- k: knit — insert the needle and pull a new loop through.
- p: purl — insert the needle and pull a new loop through from the front.
- st(s): stitch(es).
- RS: right side — the side of the fabric that faces out.
- WS: wrong side — the inside of the fabric.
- 1x1 rib: alternating k1, p1 across every row, which gives a stretchy, textured fabric.
- Bind off: close the live stitches so the edge does not unravel.
Gauge
16 stitches and 20 rows = 4 inches in 1x1 ribbing, unstretched. Knit a small swatch in ribbing, lay it flat without stretching, and count stitches and rows over 4 inches to check your gauge before beginning.
Tips Before You Start
- Velvet yarn can shed and slip, so keep your tension relaxed and avoid pulling the working yarn tight after each stitch.
- Because ribbing pulls in, measure your towel and potholder flat and unstretched to match the finished sizes.
- Carry colors up the side edge rather than cutting after every stripe, then weave the short floats in neatly at the end.
- Pick up edging stitches evenly along the long edges — count as you go so each side gets exactly 40 stitches.
Step-by-Step Instructions
Towel
Row 1 (RS): With A, CO 40 sts. Work in 1x1 rib (k1, p1) across (40 sts).
Rows 2-4: Repeat Row 1 in 1x1 rib (40 sts).
Rows 5-16: Change to B. Work 12 rows in 1x1 rib (40 sts).
Rows 17-28: Change to C. Work 12 rows in 1x1 rib (40 sts).
Rows 29-40: Change to D. Work 12 rows in 1x1 rib (40 sts).
Rows 41-75: Change to A. Continue in 1x1 rib until the piece measures 15 inches from the cast-on edge, ending with a WS row (40 sts).
Final row: Bind off in rib (40 sts bound off).
Towel Edging (worked twice, once on each long edge)
Row 1 (RS): With RS facing and A, pick up and knit 40 sts evenly along one long edge (40 sts).
Row 2: Knit across (40 sts).
Row 3: Knit across, then bind off (40 sts bound off).
Repeat Rows 1-3 along the other long edge.
Potholder
Row 1 (RS): With A, CO 28 sts. Work in 1x1 rib (k1, p1) across (28 sts).
Rows 2-36: Repeat Row 1 in 1x1 rib until the piece measures approx. 7 inches (28 sts).
Final row: Bind off in rib (28 sts bound off).
Potholder Edging (worked twice, on two opposite sides)
Row 1 (RS): With RS facing and B, pick up and knit 28 sts evenly along one side (28 sts).
Row 2: Knit across (28 sts).
Row 3: Knit across, then bind off (28 sts bound off).
Repeat Rows 1-3 along the opposite side.
Corner Loop
Row 1 (RS): With B, CO 8 sts. Work in 1x1 rib (k1, p1) across (8 sts).
Rows 2-20: Repeat Row 1 in 1x1 rib until the strip measures 4 inches (8 sts).
Final row: Bind off in rib (8 sts bound off).
Assembly and Finishing
Fold the corner loop in half and sew both ends securely to one corner of the potholder with B, using a few firm stitches so it holds under weight. Weave in all ends on the wrong side, working each tail through several stitches before trimming. Lay the towel and potholder flat and block lightly: mist with water, smooth into shape to the finished measurements, and let dry completely before hanging or using.
Pro Tips and Variations
- Swap the spice palette for two colors only, alternating wide and narrow stripes for a simpler look.
- Add a second corner loop to the towel so it can hang from an oven handle.
- Work the edgings in a contrasting color, or use a slightly larger needle for the edging rows so the borders lie perfectly flat.