Retro Ripple Square Panel: Free Crochet Pattern

Introduction
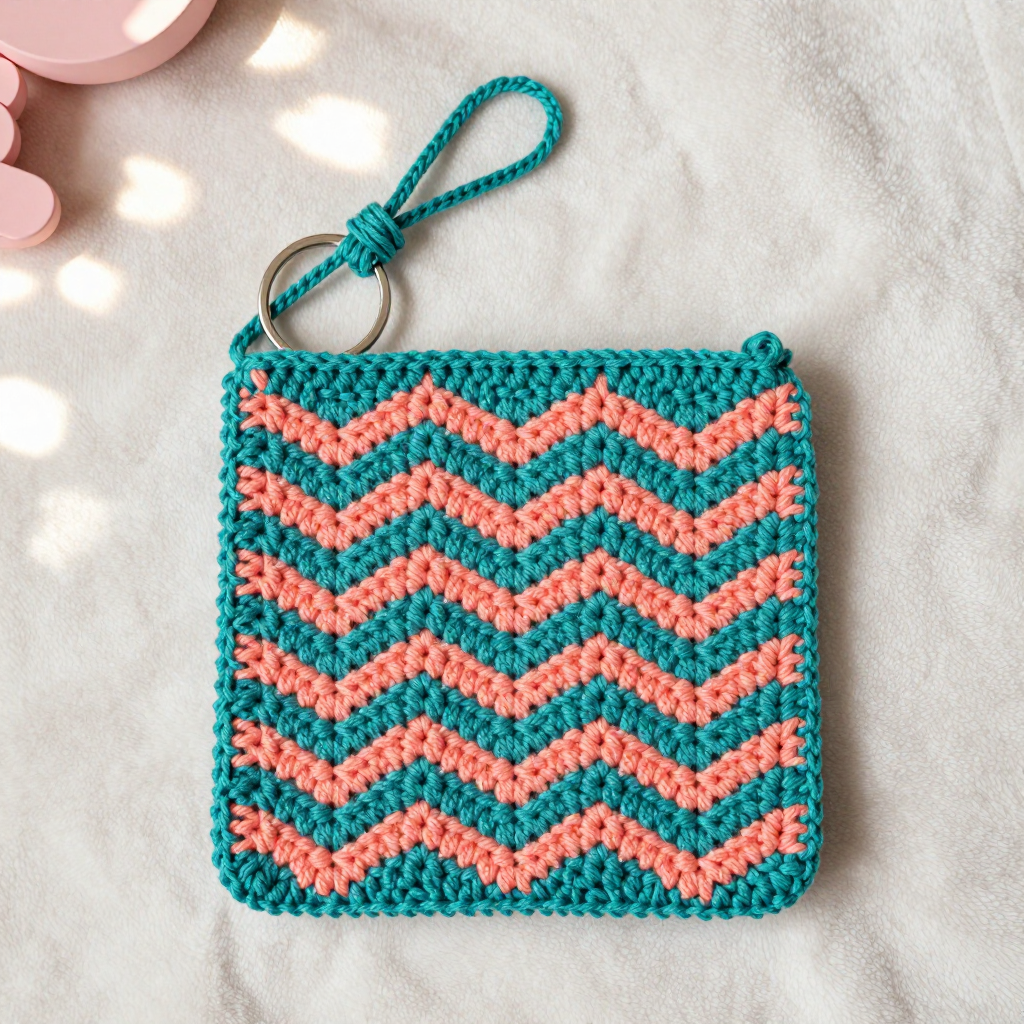
This Retro Ripple Square Panel is a beginner-friendly 12-inch crochet square that captures that wavy, wonderful 90s chevron vibe. Worked side to side in simple single crochet ripple stitch, it uses just two colors — warm terracotta and sunny mustard — in easy two-row stripes. The result is a soft, squishy panel with gentle peaks and valleys that looks far more intricate than it is. Once blocked into a perfect square, it's ideal for blankets, pillows, bags, or any project that calls for a 12-inch square.
Materials Needed
- Yarn: Worsted weight (4) acrylic yarn, approximately 150 yards total — 100 yards terracotta (A) and 50 yards mustard (B)
- Hook: 6.0 mm (J/10) crochet hook
- Notions: Tapestry needle for weaving in ends, scissors, stitch markers (optional), blocking mat and pins
- Finished size: 12 inches square after blocking
Abbreviations
- ch — chain: yarn over and pull through the loop on your hook
- sc — single crochet: insert hook in stitch, yarn over, pull up a loop, yarn over, pull through both loops
- st(s) — stitch(es)
- sl st — slip stitch: insert hook in stitch, yarn over, pull through both the stitch and the loop on your hook
- rep — repeat
- A — terracotta; B — mustard
Gauge
14 stitches and 8 rows = 4 inches in ripple pattern. To check, crochet a small swatch in pattern and measure a 4-inch section; adjust your hook size if needed to match.
Tips Before You Start
- Count your peaks and valleys. Each row should keep the same 48 stitches — if you lose count, the ripple will drift. Count after every row until you find the rhythm.
- Change colors on the last stitch of the row. Pull the new color through the final yarn-over of the last sc so the stripe edge stays clean.
- Keep your skipped stitches loose. The valleys (skip 2 sts) pull the fabric in; don't tug them tight or the square will narrow.
- Don't skip blocking. Ripple stitch naturally curls and waves — blocking is what turns it into a true 12-inch square.
Step-by-Step Instructions
Panel (Color A)
Ch 50.
Row 1: Sc in 2nd ch from hook, sc in next 5 ch, *3 sc in next ch, sc in next 5 ch, skip 2 ch, sc in next 5 ch; rep from * to last 7 ch, 3 sc in next ch, sc in last 6 ch. (48 sc)
Row 2: Ch 1, turn, sc in first 6 sts, *3 sc in next st, sc in next 5 sts, skip 2 sts, sc in next 5 sts; rep from * to last 7 sts, 3 sc in next st, sc in last 6 sts. (48 sc)
Rows 3-4: Rep Row 2. (48 sc) Change to B.
Rows 5-6: Rep Row 2. (48 sc) Change to A.
Rows 7-8: Rep Row 2. (48 sc) Change to B.
Rows 9-10: Rep Row 2. (48 sc) Change to A.
Rows 11-12: Rep Row 2. (48 sc) Change to B.
Rows 13-14: Rep Row 2. (48 sc) Change to A.
Rows 15-16: Rep Row 2. (48 sc) Change to B.
Rows 17-18: Rep Row 2. (48 sc) Change to A.
Rows 19-20: Rep Row 2. (48 sc) Change to B.
Rows 21-22: Rep Row 2. (48 sc) Change to A.
Rows 23-24: Rep Row 2. (48 sc) Change to B.
Rows 25-26: Rep Row 2. (48 sc) Change to A. Do not fasten off.
Edging (Color A)
Edging: Ch 1, turn, sc evenly around entire panel, working 3 sc in each corner. Join with sl st to first sc. Fasten off.
Assembly and Finishing
Weave in all ends on the wrong side with your tapestry needle, working each end through several stitches so it stays secure. If you're joining this square to others, use your preferred method (whipstitch or single crochet join) along the edging. Block the panel to a 12-inch square: pin it out on a blocking mat, mist with water, and let it dry completely — this smooths the ripples and sets the size.
Pro Tips and Variations
- Change the palette: Swap terracotta and mustard for teal and cream, or any two colors that echo the 90s vibe you love.
- Make it bigger: Add more 2-row stripes to grow the panel, or chain a longer starting chain to widen it — just keep the ripple repeat intact.
- Use it as a pillow front: Pair two blocked squares right sides together, sc around three sides, insert a 12-inch pillow form, and sc the last side closed.