Polka Dot Button Cuff Free Crochet Pattern
Introduction
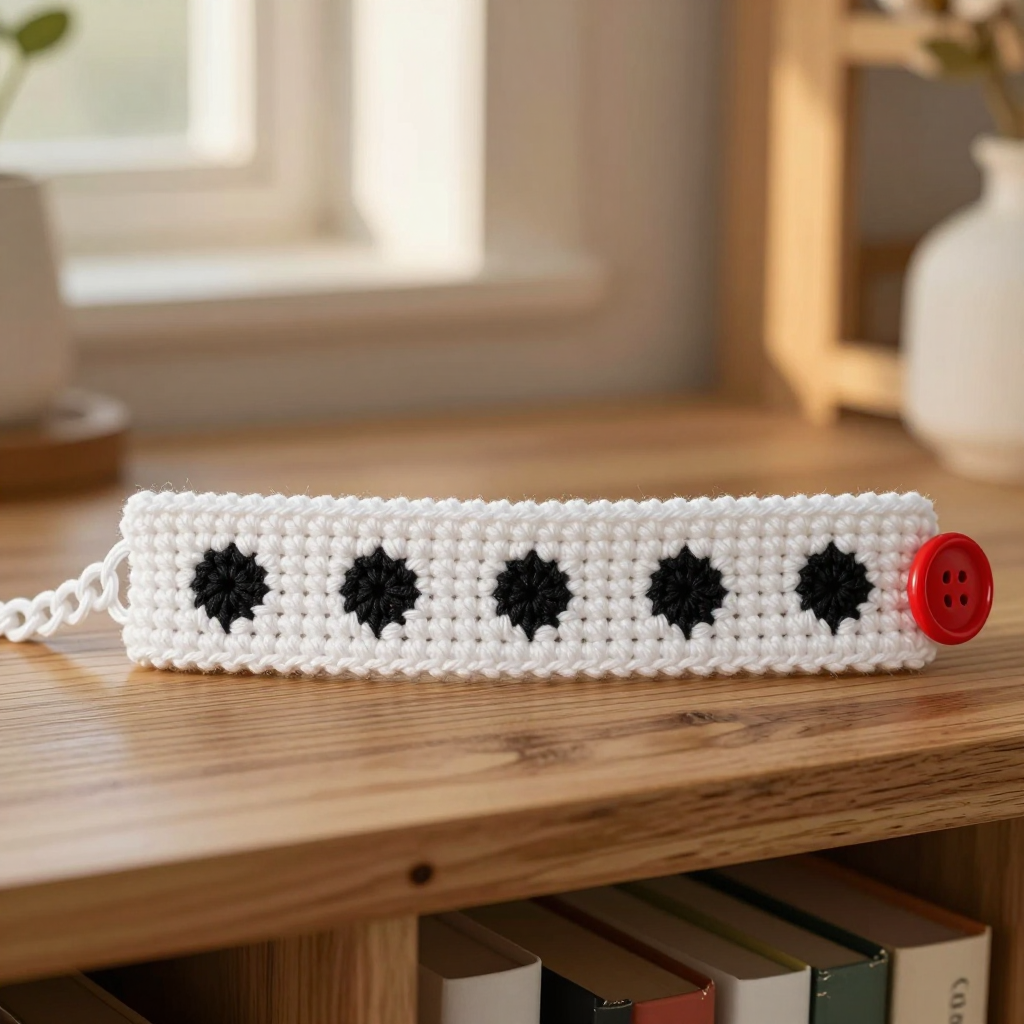
This polka dot button cuff is a quick, cheerful little project that's perfect for anyone who wants to try crochet jewelry without committing to a big garment. It's made as a simple flat rectangle of single crochet, then dressed up with five tiny black appliquéd dots and one bold red button. The result is a smooth, slightly stiff cotton band that sits comfortably on the wrist and looks like something you'd pick up at a boutique. It's a great scrap-buster and a lovely handmade gift for a friend, a teen, or yourself.
Materials Needed
- Yarn: Fine (2) weight cotton yarn — white (A) 20 yards, black (B) 5 yards, red (C) 2 yards. Cotton gives the cuff its crisp, hold-its-shape feel.
- Hooks: 2.75 mm (US C) for the cuff band and button loop; 3.25 mm (US D) for the dots.
- Notions: Tapestry needle for seaming and weaving in ends, one large red button (about 3/4 inch / 20 mm), scissors, and a stitch marker if you like to mark your first stitch.
- Finished size: 6.5 inches long (adjustable) x 1.25 inches wide; fits a wrist up to 7 inches.
Abbreviations
- ch — chain: make a loop of yarn and pull it through the loop on your hook.
- sc — single crochet: insert hook, pull up a loop, yarn over, pull through both loops.
- sl st — slip stitch: insert hook, yarn over, pull through both the stitch and the loop on your hook at once.
- st(s) — stitch(es).
- MR — magic ring: an adjustable loop you crochet into, then pull closed.
- R — row.
Gauge
24 stitches and 28 rows = 4 inches in single crochet with the 2.75 mm hook. To check it, crochet a small swatch in sc, measure a 4-inch section, and count your stitches and rows; adjust your hook size if you're off by more than one stitch.
Tips Before You Start
- Keep your single crochet tension even and slightly firm — a snug, dense fabric helps the cuff hold its shape on the wrist.
- Work the dots with the larger 3.25 mm hook so they lie flat and round rather than cupping.
- Before sewing the button, wrap the cuff around your wrist to check the fit and adjust the button loop or button placement if needed.
- Leave a 6-inch tail on each dot so you have plenty of yarn to sew them down securely.
Step-by-Step Instructions
Cuff Band (Yarn A)
With the 2.75 mm (C) hook and yarn A:
Row 1: Ch 9, sc in the 2nd ch from hook and in each ch across (8 sts).
Row 2: Ch 1, turn, sc in each st across (8 sts).
Rows 3–39: Repeat Row 2 (8 sts).
Fasten off. The band should measure about 6.5 inches long and 1.25 inches wide. For a larger wrist, add rows in pairs until the band wraps comfortably around the wrist with a small overlap.
Polka Dots (Yarn B) — make 5
With the 3.25 mm (D) hook and yarn B:
Rnd 1: Make a magic ring, 6 sc into the ring, join with a sl st to the first sc (6 sts).
Fasten off, leaving a 6-inch tail for sewing.
Button Loop (Yarn A)
With the 2.75 mm (C) hook and yarn A, join yarn at one short end of the cuff:
Loop: Ch 8, sl st to the same short end to form a loop. Fasten off.
Assembly and Finishing
Thread a tapestry needle with a dot tail and sew the 5 dots evenly spaced along the center of the cuff, working from one short end toward the other. Sew the large red button at the opposite short end from the loop, positioning it so the loop slips over it snugly. Weave in all ends on the wrong side. Lightly steam-block the cuff flat with a warm iron held just above the fabric (never press directly onto the cotton), then let it dry completely before wearing.
Pro Tips and Variations
- Swap the dot colors for a custom palette — navy, mustard, or a single contrasting dot for a minimalist look.
- Use a slightly larger button and a longer chain loop to make an adjustable, one-size-fits-most cuff.
- Add a second row of dots or a contrasting sc border around the cuff edge for a bolder, more finished look.