Plum Pom Jar Cover Free Crochet Pattern
Introduction
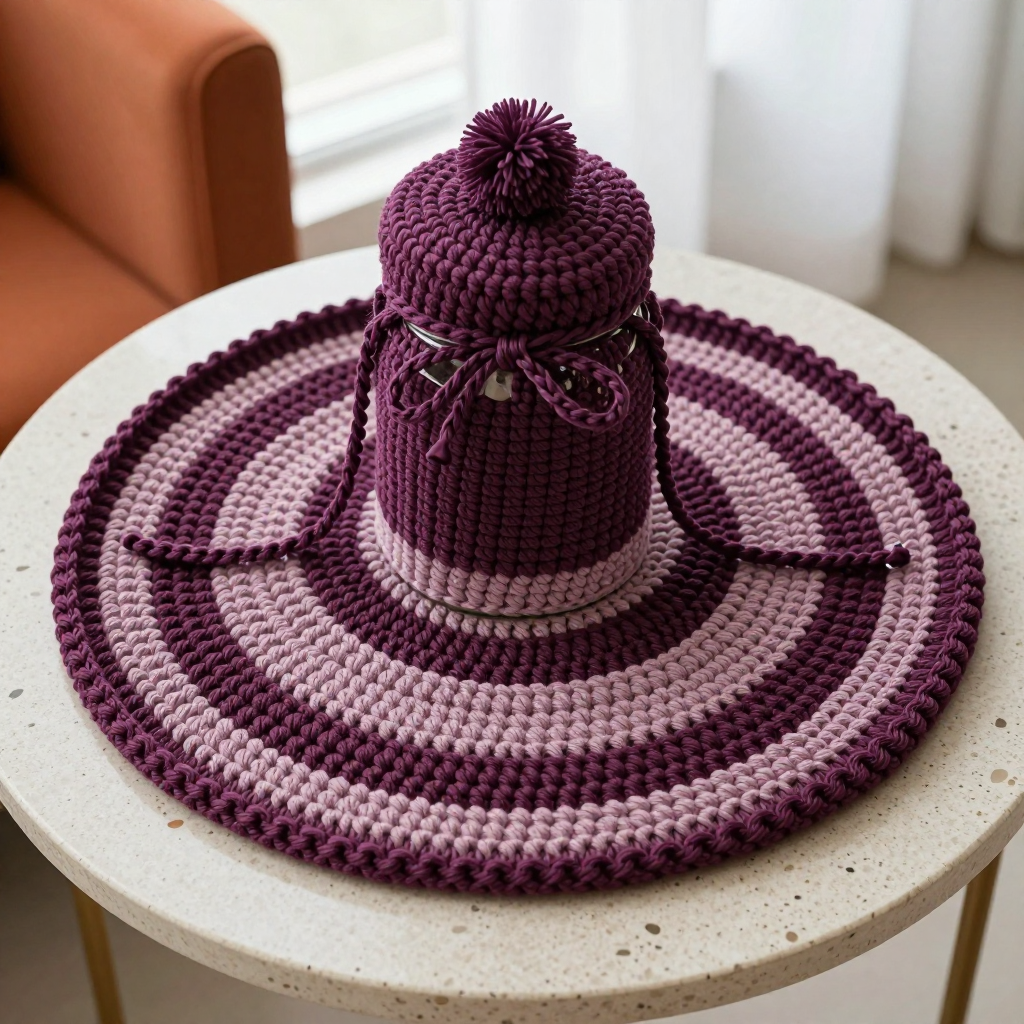
This Plum Pom Jar Cover is a sweet little project for anyone who loves quick, satisfying crochet that turns everyday pantry jars into something worth leaving out on the counter. Worked as a flat circle in smooth double crochet, it uses just two colors — a deep plum and a soft mauve — in simple stripes that feel like a coastal grandmother's kitchen. The circle is gathered around a standard jar lid with a crocheted drawstring and topped with a tiny pom at the center. It works up in well under an hour, uses only scraps of worsted cotton, and makes a charming gift or stash-buster.
Materials Needed
- Yarn: Worsted weight (CYC 4) cotton — approx 40 yd (37 m) plum (Color A) and 25 yd (23 m) mauve (Color B); a small amount of A for the pom
- Hook: 4.0 mm (US G-6)
- Notions: yarn needle, scissors, a standard 2.75 in (7 cm) jar lid for fitting, a 4-finger form (or a 1.5 in pom maker) for the pom
- Finished size: flat circle 4.5 in (11.5 cm) diameter, gathered to fit a standard 2.75 in (7 cm) jar lid; pom 1.5 in (4 cm)
Abbreviations
- ch — chain
- dc — double crochet
- sl st — slip stitch
- st(s) — stitch(es)
- MR — magic ring
- [ ] — repeat the instructions inside the brackets the number of times stated
Gauge
16 dc x 8 rnds = 4 in (10 cm) after blocking. Work a small swatch in double crochet rounds and measure across the center; if your circle comes out larger than 4.5 in at 72 stitches, go down a hook size, and up a size if it comes out smaller.
Tips Before You Start
- Cotton has little stretch, so keep your tension relaxed and even — a tight circle will pucker when gathered.
- Each round begins with ch 2 (counts as the first dc) and ends with a sl st to that starting chain; keep those joins at the same spot so the stripes stay tidy.
- Change colors on the final yarn-over of the last stitch of the round before the new color, so the stripe edge looks clean.
- Block the circle flat before gathering — it makes the finished cover sit smoothly over the lid.
Step-by-Step Instructions
Circle (start in Color A)
Rnd 1: MR, 8 dc into the ring, sl st to first dc (8 sts).
Rnd 2: Ch 2, 2 dc in each st around, sl st to top of ch 2 (16 sts).
Rnd 3: Ch 2, [dc, 2 dc] x8, sl st (24 sts).
Rnd 4: Ch 2, [dc, dc, 2 dc] x8, sl st (32 sts).
Rnd 5: Ch 2, [dc x3, 2 dc] x8, sl st (40 sts).
Rnd 6: Ch 2, [dc x4, 2 dc] x8, sl st (48 sts). Change to Color B.
Rnd 7: Ch 2, [dc x5, 2 dc] x8, sl st (56 sts).
Rnd 8: Ch 2, [dc x6, 2 dc] x8, sl st (64 sts). Change to Color A.
Rnd 9: Ch 2, [dc x7, 2 dc] x8, sl st (72 sts). Fasten off and weave in ends.
Drawstring (Color B)
Row 1: Ch 60, then sl st in each ch across (60 sts). Fasten off, leaving 2 in (5 cm) tails.
Pom (Color A)
Wrap yarn around 4 fingers approx 40 times. Tie the bundle tightly at the center, cut the loops, and trim to a 1.5 in (4 cm) pom.
Assembly and Finishing
Block the circle flat and let it dry completely. With the yarn needle and Color B, work a running stitch around the Rnd 9 edge, leaving 2 in (5 cm) tails at each end. Place the circle over the jar lid and pull the tails to gather it snugly around the lid rim, then tie them in a bow. Thread the pom onto the center of the circle through the magic-ring hole, secure it with two knots, and trim the tails. Weave in all remaining ends.
Pro Tips and Variations
- Swap the stripe colors for a single solid shade, or add a third thin stripe for a bolder look.
- Skip the pom and add a small crocheted flower or button at the center instead.
- Make a set in matching colors for a coordinated pantry — the cover fits any standard 2.75 in (7 cm) lid.