Art Deco Sunburst Trivet Free Crochet Pattern
Introduction
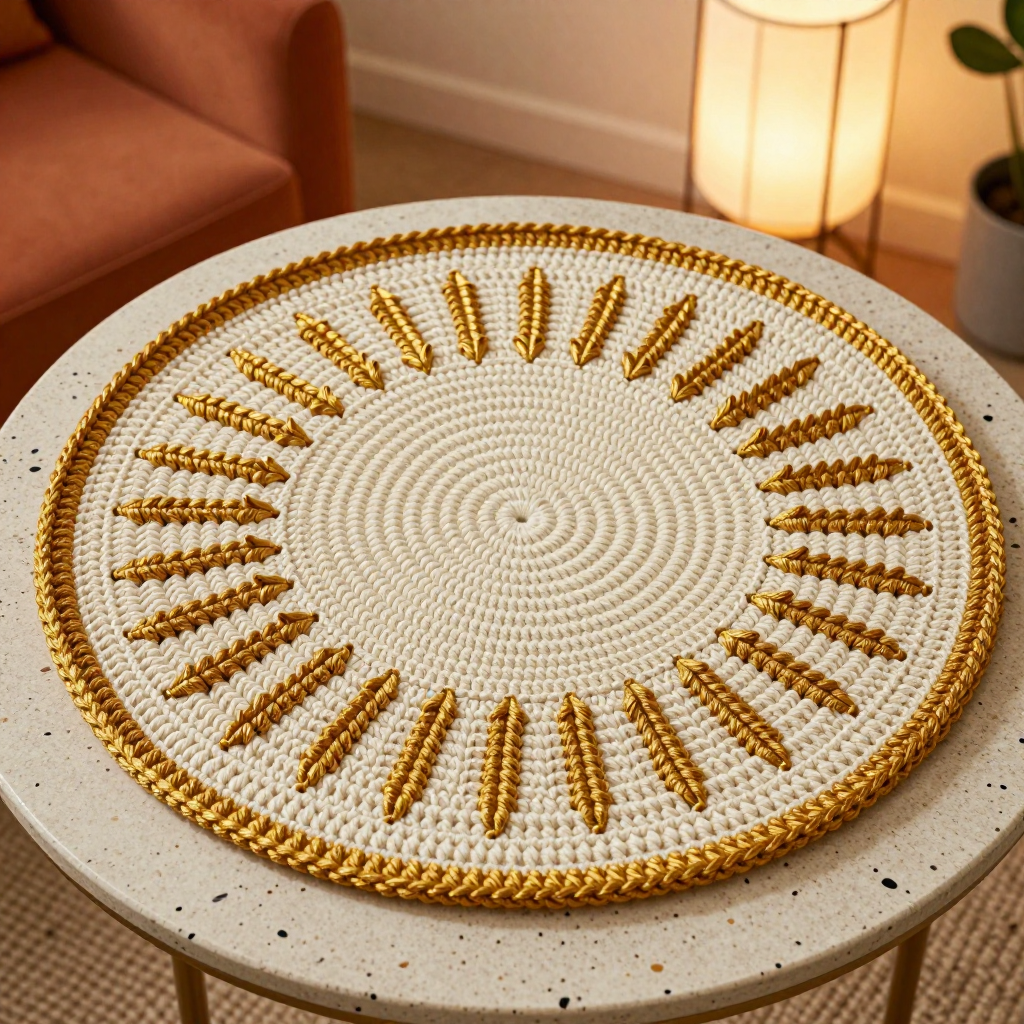
This Art Deco Sunburst Trivet is a quick, satisfying project for anyone who wants a little glamour on the table without a big time commitment. Worked in joined single crochet rounds, the flat cream disc is finished with a ring of chunky gold spike stitches that radiate outward like sunburst rays, then framed with a simple gold border. It looks crisp and geometric, feels sturdy and flat under a hot dish, and uses only beginner stitches, so it is a wonderful first home decor project. Make one for yourself or stitch a set as a thoughtful handmade gift.
Materials Needed
- Yarn: Worsted weight (category 4) cotton yarn, approximately 50 yards cream (A) and 20 yards gold (B). Sample uses Lily Sugar'n Cream (100% cotton, 2.5 oz/120 yd per skein) in Cream (A) and Gold (B).
- Hook: 5.0 mm (H-8) crochet hook
- Notions: Tapestry needle for weaving in ends, stitch marker (optional, for marking the first stitch of each round), scissors
- Finished size: Approximately 7 inches (18 cm) in diameter
Abbreviations
- ch — chain: yarn over and pull through the loop on your hook.
- sc — single crochet: insert hook in stitch, yarn over, pull up a loop, yarn over, pull through both loops.
- sl st — slip stitch: insert hook in stitch, yarn over, pull through both the stitch and the loop on your hook.
- st / sts — stitch / stitches
- spike st — spike stitch: insert hook in the stitch 2 rounds below, yarn over, pull up a loop, yarn over, pull through both loops on hook.
- [ ] — repeat the instructions inside the brackets the number of times stated
Gauge
14 sc and 16 rounds = 4 inches (10 cm) in single crochet. To check, crochet a small flat swatch in joined sc rounds and measure the stitch and round counts over 4 inches; adjust your hook size if needed so your trivet finishes at about 7 inches across.
Tips Before You Start
- Every round is joined with a sl st to the first stitch and begins with ch 1, which does not count as a stitch. Always work your first sc into the same stitch as the join so your counts stay correct.
- Keep your tension even and your increases spaced as written; this keeps the circle flat. If the edges start to ruffle, your stitches are too loose or too many; if it cups, they are too tight.
- When you make a spike stitch, pull the loop up to the height of the current round so the gold bar sits flat and even with the surface rather than puckering.
- Count your stitches at the end of each round. The stitch count in parentheses tells you exactly what you should have before moving on.
Step-by-Step Instructions
Center Circle (Color A)
With A, make a magic ring.
R1: Ch 1, 6 sc in ring, join with sl st to first sc. (6 sc)
R2: Ch 1, 2 sc in each st around, join. (12 sc)
R3: Ch 1, [sc in next st, 2 sc in next st] around, join. (18 sc)
R4: Ch 1, [sc in next 2 sts, 2 sc in next st] around, join. (24 sc)
R5: Ch 1, [sc in next 3 sts, 2 sc in next st] around, join. (30 sc)
R6: Ch 1, [sc in next 4 sts, 2 sc in next st] around, join. (36 sc)
R7: Ch 1, [sc in next 5 sts, 2 sc in next st] around, join. (42 sc)
R8: Ch 1, [sc in next 6 sts, 2 sc in next st] around, join. (48 sc)
R9: Ch 1, [sc in next 7 sts, 2 sc in next st] around, join. (54 sc)
R10: Ch 1, [sc in next 8 sts, 2 sc in next st] around, join. (60 sc)
R11: Ch 1, [sc in next 9 sts, 2 sc in next st] around, join. (66 sc)
R12: Ch 1, sc in each st around, join. (66 sc)
Change to B.
Sunburst Spike Ring (Color B)
R13 (spike round): Ch 1, sc in first st, [spike st in next st (insert hook in st 2 rounds below, yarn over, pull up a loop, yarn over, pull through both loops on hook), sc in next st] around, join. (33 spike sts, 33 sc)
R14: Ch 1, sc in each st around, join. (66 sc)
Fasten off. Weave in ends.
Edging (Color B)
With B, join yarn with sl st in any st of R14, ch 1, sc in each st around, join with sl st to first sc. (66 sc)
Fasten off. Weave in ends.
Assembly and Finishing
There is no seaming to do; this trivet is worked in one continuous piece. Weave in all yarn tails on the wrong side, working each end through several stitches in two directions so it stays secure through washing. Block lightly to shape: mist the trivet with water, pat it flat into a true circle, and let it dry completely before use. Cotton holds its shape well after blocking, so the spike ring will lie flat and even.
Pro Tips and Variations
- Color swap: Try a deep teal or black center with a metallic gold spike ring for a bolder Deco look, or reverse the colors so the spikes pop in cream against a gold disc.
- Make a set: Work the same pattern in two or three colorways to create a matching stack of trivets, or scale the center up by adding one more increase round for a larger hot pad.
- Add a hanging loop: After the edging, ch 10 and sl st back into the same stitch to form a small loop, then fasten off, so the trivet can hang on a hook between uses.


