Lavender Haze Patchwork Coatigan: Free Crochet Pattern
Introduction
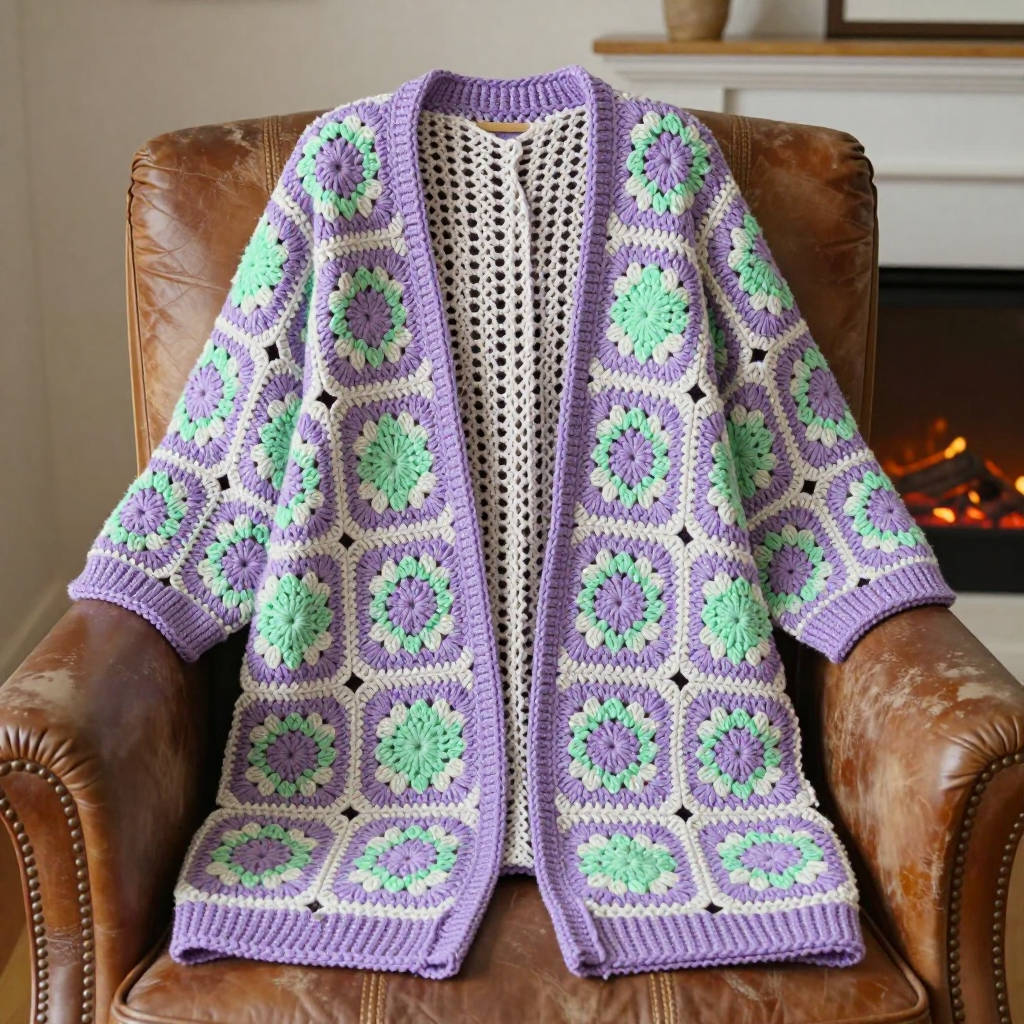
The Lavender Haze Patchwork Coatigan is a cozy, boxy layer that anyone can make — even if you've never joined a granny square before. It's built from 62 classic granny squares in soft lavender and mint, arranged in bold color blocks so the finished coatigan looks modern and intentional rather than busy. The open, lacy square texture keeps it light and drapey, while plain single-crochet bands at the neck, hem and cuffs give it a clean, polished edge. Slip it on over jeans and a tee and it feels like a favorite cardigan with a little extra warmth and a lot of personality.
Materials Needed
- Yarn: Worsted weight (4) acrylic or cotton blend. Lavender (A): 800 (900, 1000) yds. Mint (B): 600 (700, 800) yds.
- Hook: 5.5 mm (I-9) crochet hook
- Notions: Tapestry needle, stitch markers, scissors, tape measure
- Finished size: Bust 48 (52, 56)″ [122 (132, 142) cm]; Length 36 (39, 42)″ [91.5 (99, 106.5) cm]
Abbreviations
- ch — chain
- sl st — slip stitch
- dc — double crochet
- sc — single crochet
- sp — space
- RS — right side
- rep — repeat
Gauge
One granny square = 6 x 6″ [15 x 15 cm]. Work one square in the pattern below and measure it flat; if it's smaller than 6″, go up a hook size, and if it's larger, go down a hook size.
Tips Before You Start
- Make one practice square first and measure it — square size controls the whole fit, so getting gauge right before you make 62 saves time.
- Keep your color order consistent: every square is lavender (R1), mint (R2), lavender (R3), mint (R4), lavender (R5).
- Lay out all your finished squares on the floor in the panel arrangement before seaming so you can check the color blocks at a glance.
- Leave a long tail (about 8″) when fastening off each round — those tails are handy for whipstitching later.
Step-by-Step Instructions
Granny Square (make 62)
Rnd 1: With A, ch 4, join with sl st to form ring. Ch 3 (counts as dc), 2 dc in ring, [ch 2, 3 dc in ring] 3 times, ch 2, join with sl st to top of ch-3. Fasten off A. (12 dc, 4 ch-2 sps)
Rnd 2: Join B with sl st in any ch-2 sp, ch 3, 2 dc in same sp, ch 2, 3 dc in same sp, *ch 1, (3 dc, ch 2, 3 dc) in next ch-2 sp; rep from * around, ch 1, join with sl st to top of ch-3. Fasten off B. (24 dc, 4 ch-2 sps, 4 ch-1 sps)
Rnd 3: Join A with sl st in any ch-2 sp, ch 3, 2 dc in same sp, ch 2, 3 dc in same sp, *ch 1, 3 dc in next ch-1 sp, ch 1, (3 dc, ch 2, 3 dc) in next ch-2 sp; rep from * around, ch 1, join with sl st to top of ch-3. Fasten off A. (36 dc, 4 ch-2 sps, 8 ch-1 sps)
Rnd 4: Join B with sl st in any ch-2 sp, ch 3, 2 dc in same sp, ch 2, 3 dc in same sp, *[ch 1, 3 dc in next ch-1 sp] twice, ch 1, (3 dc, ch 2, 3 dc) in next ch-2 sp; rep from * around, ch 1, join with sl st to top of ch-3. Fasten off B. (48 dc, 4 ch-2 sps, 12 ch-1 sps)
Rnd 5: Join A with sl st in any ch-2 sp, ch 3, 2 dc in same sp, ch 2, 3 dc in same sp, *[ch 1, 3 dc in next ch-1 sp] 3 times, ch 1, (3 dc, ch 2, 3 dc) in next ch-2 sp; rep from * around, ch 1, join with sl st to top of ch-3. Fasten off. (60 dc, 4 ch-2 sps, 16 ch-1 sps)
Square measures 6 x 6″ [15 x 15 cm]. Repeat Rnds 1–5 until you have 62 squares.
Assembly Layout
Back: 4 squares wide x 6 squares high (24 x 36″).
Left Front: 2 squares wide x 6 squares high (12 x 36″).
Right Front: 2 squares wide x 6 squares high (12 x 36″).
Sleeves (make 2): 2 squares wide x 3 squares high each (12 x 18″).
Neck Band
Row 1: With RS facing, join A at right front neck edge, work sc evenly around neck edge, turn. (Approx. 60 (64, 68) sc)
Rows 2–3: Ch 1, sc in each sc across, turn. (60 (64, 68) sc) Fasten off.
Hem Band
Row 1: Join A at bottom right front corner, work sc evenly around entire bottom edge, turn. (Approx. 96 (104, 112) sc)
Rows 2–3: Ch 1, sc in each sc across, turn. (96 (104, 112) sc) Fasten off.
Sleeve Cuffs (make 2)
Row 1: Join A at sleeve edge, work sc evenly around, turn. (Approx. 36 (40, 44) sc)
Rows 2–3: Ch 1, sc in each sc across, turn. (36 (40, 44) sc) Fasten off. Repeat for second sleeve.
Assembly and Finishing
Arrange all squares following the layout above. Sew squares together with whipstitch using matching yarn, joining squares into strips first, then joining the strips into panels. Join the back to the fronts at the shoulders, then attach the sleeves at the shoulders and sides as part of the patchwork assembly. Work the neck band, hem band and cuffs as described. Weave in all ends. Block lightly by misting with water and pinning to measurements, then let dry flat.
Pro Tips and Variations
- Swap mint for another contrast color to change the mood — a soft gray or cream keeps it neutral.
- Add a single row of sc along the front opening edges for a slightly more finished look.
- Make it longer by adding one more row of squares to each panel (allow extra yarn).