Crochet Elegant Textured Honeycomb Cream Rug Free Pattern
Crochet Elegant Textured Honeycomb Cream Rug – Free Pattern
Introduction
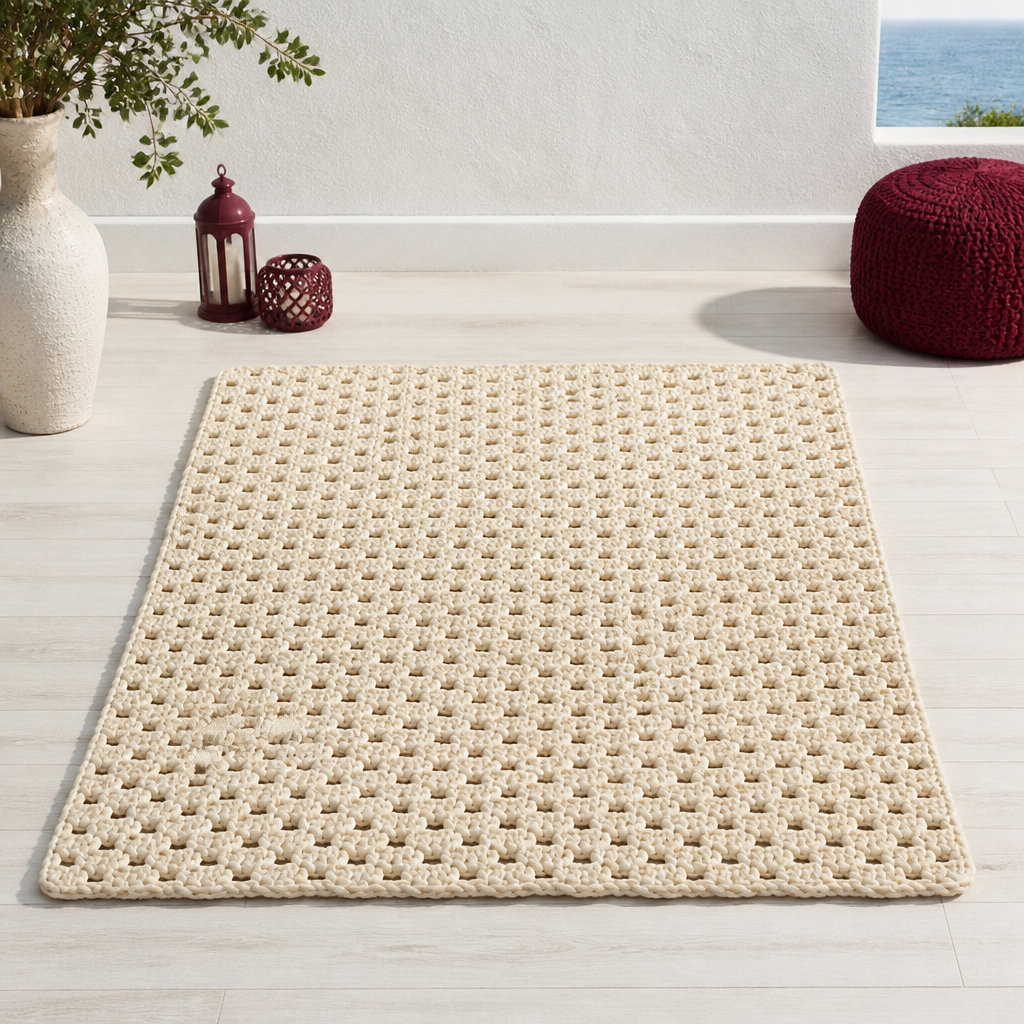
This elegant honeycomb rug is a wonderful project for anyone who has mastered the basic crochet stitches and wants to make something truly special for their home. The alternating rows of open double crochet mesh and firm single crochet create a raised honeycomb texture that looks far more complicated than it actually is. Worked in a soft cream bulky yarn, the rug feels plush and cozy underfoot while the openwork cells add depth and visual interest to any living room or bedroom. It is a relaxing, repetitive make that grows quickly on a large hook, and the finished piece looks beautifully boutique.
Materials Needed
- Yarn: Bulky weight (category 5) cream yarn, approximately 2,800–3,200 yards (2,560–2,930 m), about 14–16 skeins of 200 g each, or enough to reach the finished size at gauge.
- Hook: Size L / 8.0 mm, or the size needed to obtain gauge.
- Notions: Scissors, tapestry needle, and stitch markers (optional, for marking pattern repeats).
- Finished size: Approximately 4 x 6 feet (48 x 72 inches / 122 x 183 cm).
Abbreviations
- ch = chain (a loop made by pulling yarn through a loop on the hook).
- dc = double crochet (yarn over, insert hook, pull up a loop, yarn over and pull through two loops twice).
- sc = single crochet (insert hook, pull up a loop, yarn over and pull through both loops).
- sl st = slip stitch (insert hook, pull up a loop and pull it straight through the loop on the hook).
- st(s) = stitch(es).
- sp = space.
- ch-1 sp = chain-1 space (the small gap made by a single chain between stitches).
- turning ch = turning chain (the chains worked at the start of a row to bring your yarn up to the new row's height).
Gauge
4 stitches and 4 rows = 2 inches (5 cm) in pattern; one pattern repeat (2 dc, 1 ch-1 space) measures about 1 inch (2.5 cm) wide. Work a small swatch and measure it before beginning, adjusting your hook size if needed to match the finished size.
Tips Before You Start
- The honeycomb texture comes from alternating the double crochet mesh rows (Rows 2 and 4) with a single crochet row (Row 3). The dc/ch-1 mesh forms the openwork hexagon cells, and the sc row compresses the mesh to create the raised honeycomb ridges, so keep your tension even across all three rows.
- Always work the first dc of a row into the first ch-1 space (or as directed) and the last dc into the top of the turning chain, unless otherwise stated, to keep the edges straight and smooth.
- Turning chains count as a stitch throughout, so do not skip them when counting.
- To adjust the width, chain any multiple of 2 plus 4 (for example, 96 chains = 92 + 4). The pattern repeat is 2 stitches.
Step-by-Step Instructions
Foundation Row
Foundation: Ch 96 (or any multiple of 2 plus 4 for your desired width).
Row 1 (right side)
Row 1: Dc in the 4th ch from hook (the first 3 ch count as the first dc), ch 1, skip next ch, *dc in next ch, ch 1, skip next ch; repeat from * across, ending with dc in the last ch, turn (49 dc, 47 ch-1 spaces).
Row 2
Row 2: Ch 2 (counts as first dc), dc in first ch-1 space, *ch 1, dc in next ch-1 space; repeat from * across, ending with dc in the top of the turning ch, turn (49 dc, 47 ch-1 spaces).
Row 3
Row 3: Ch 1, sc in first dc, *ch 1, sc in next ch-1 space; repeat from * across, ending with sc in the top of the turning ch, turn (48 sc, 47 ch-1 spaces).
Row 4
Row 4: Ch 2 (counts as first dc), dc in first ch-1 space, *ch 1, dc in next ch-1 space; repeat from * across, ending with dc in the top of the turning ch, turn (49 dc, 47 ch-1 spaces).
Repeat Rows 2–4
Body: Repeat Rows 2–4 until the rug measures approximately 6 feet (72 inches / 183 cm) in length, ending after a Row 3 (sc row) for a smooth edge. Do not fasten off.
Final Border
Border: Ch 1, sc evenly around the entire perimeter of the rug, working 3 sc in each corner to turn smoothly. Join with a sl st to the first sc. Fasten off.
Assembly and Finishing
This rug is worked in one piece, so no seaming is required. Weave in all yarn ends with the tapestry needle, working them back and forth through the wrong side of the fabric so they stay secure. Block the rug lightly by misting it with water and pinning it to the finished 4 x 6 foot dimensions on a clean, flat surface; let it dry completely before use. This sets the honeycomb texture and straightens the border.
Pro Tips and Variations
- Place a stitch marker in the first and last stitch of each row to keep your edges even and your stitch counts accurate.
- For a firmer, more durable rug, work the final border in two rounds of sc instead of one.
- Try a contrasting border color or a slightly different cream tone to make the honeycomb texture stand out even more.