Tiny Fox in Striped Scarf: Free Crochet Pattern
Tiny Fox in Striped Scarf: Free Crochet Pattern
Introduction
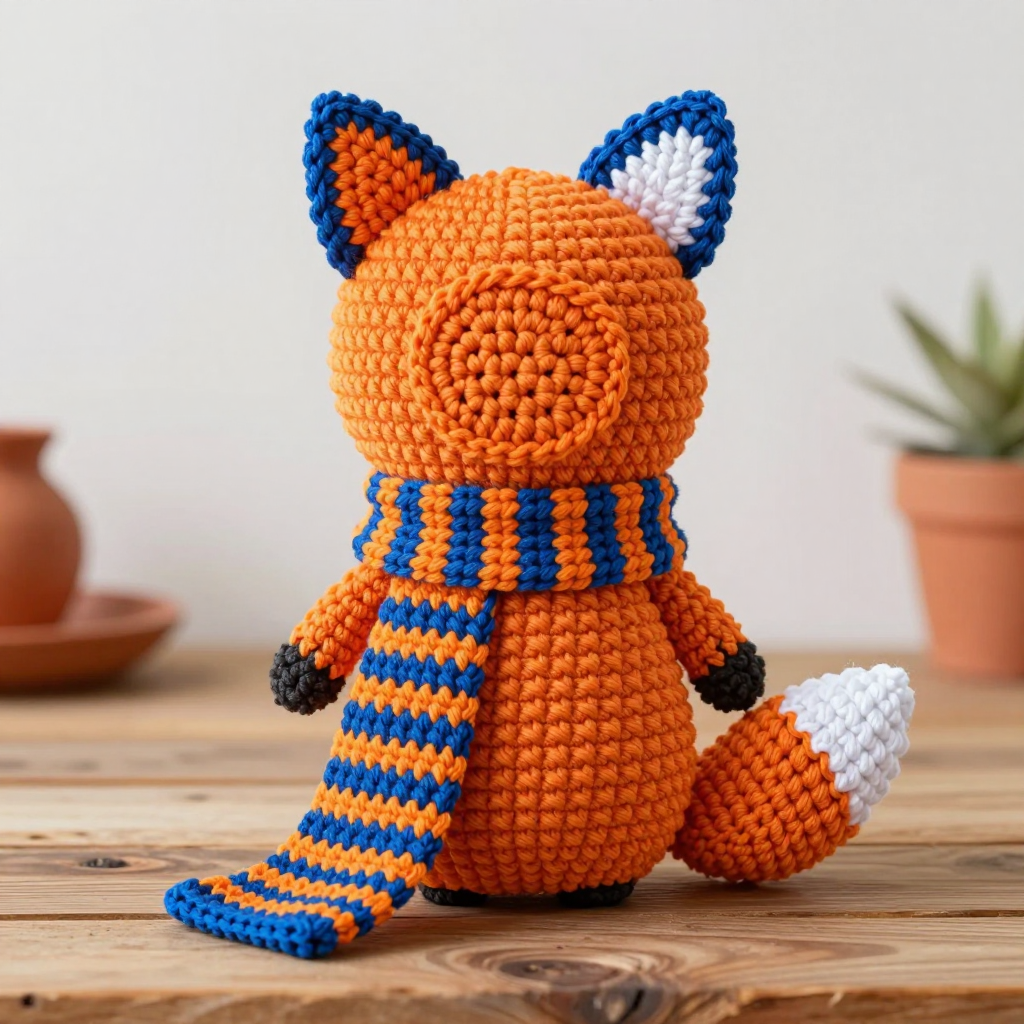
This little fox is the perfect first amigurumi: one round stuffed ball for the head and body, two tiny ears, a stubby white-tipped tail, and a wide striped scarf to finish it off. It is made from chunky chenille yarn, so it works up quickly and feels wonderfully soft and squishy in the hand. At about 5 inches tall, it is small enough to sit on a desk, a shelf, or in a coat pocket as a cheerful companion. With only single crochet, increases, and decreases, it is a gentle project for anyone who has just learned the basics.
Materials Needed
- Yarn: Chunky chenille yarn (approx. 150–200 yd per 100 g): 50 yd orange (A), 30 yd cobalt (B), 10 yd white (C) for the tail tip.
- Hook: 5.0 mm (H-8) crochet hook.
- Notions: Stitch marker, tapestry needle, scissors, polyester fiberfill stuffing.
- Finished size: Approx. 5 inches (13 cm) tall including ears, 4 inches (10 cm) wide.
Abbreviations
- MR – magic ring: a loop of yarn you crochet into to start a closed circle.
- ch – chain: a loop of yarn pulled through the previous loop.
- sc – single crochet: the basic short stitch used throughout.
- inc – increase: work 2 sc into the same stitch to add one stitch.
- dec – decrease: work 2 stitches together as one to remove one stitch.
- sts – stitches.
- FO – fasten off: cut the yarn and pull the end through the last loop.
Gauge
12 sc x 12 rows = 4 inches (10 cm) in single crochet. Crochet a small swatch in the round or flat and measure a 4-inch section; if you have more stitches than 12, go up a hook size, and if you have fewer, go down one.
Tips Before You Start
- Chenille yarn sheds and hides stitches, so use a stitch marker in the first stitch of every round and feel for the stitches rather than relying on sight alone.
- Stuff the body firmly but in small handfuls as you go, before the opening gets too small to reach inside.
- Work your increases and decreases snugly so no stuffing shows through the fabric.
- Keep your tension even on the scarf so the stripes line up neatly and the rectangle stays flat.
Step-by-Step Instructions
Head/Body (A)
Rnd 1: MR, 6 sc (6 sts).
Rnd 2: inc x6 (12 sts).
Rnd 3: [sc, inc] x6 (18 sts).
Rnd 4: [2 sc, inc] x6 (24 sts).
Rnds 5–8: sc in each st around (24 sts).
Rnd 9: [2 sc, dec] x6 (18 sts).
Rnd 10: [sc, dec] x6 (12 sts).
Rnd 11: dec x6 (6 sts).
FO, leaving a long tail for sewing. Stuff firmly.
Face Patch (A)
Rnd 1: MR, 6 sc (6 sts).
Rnd 2: inc x6 (12 sts).
Rnd 3: [sc, inc] x6 (18 sts).
FO, leaving a long tail. Sew to the front of the head, centered, covering about one third of the face.
Ears (B) – make 2
Rnd 1: MR, 4 sc (4 sts).
Rnd 2: [sc, inc] x2 (6 sts).
Rnd 3: sc in each st around (6 sts).
Rnd 4: [2 sc, inc] x2 (8 sts).
FO, leaving a long tail. Sew to the top of the head, about 1 inch apart.
Tail (A, then C)
Rnd 1: With A, MR, 4 sc (4 sts).
Rnd 2: inc x4 (8 sts).
Rnds 3–5: sc in each st around (8 sts).
Change to C.
Rnds 6–7: sc in each st around (8 sts).
FO, leaving a long tail. Sew to the back of the body.
Scarf (B and A)
With B, ch 7.
Row 1: sc in the 2nd ch from hook and in each ch across (6 sts).
Row 2: Change to A, sc across (6 sts).
Row 3: Change to B, sc across (6 sts).
Row 4: Change to A, sc across (6 sts).
Row 5: Change to B, sc across (6 sts).
Row 6: Change to A, sc across (6 sts).
Row 7: Change to B, sc across (6 sts).
Row 8: Change to A, sc across (6 sts).
Row 9: Change to B, sc across (6 sts).
Row 10: Change to A, sc across (6 sts).
FO. The scarf measures approx. 1.5 inches wide x 5 inches long.
Assembly and Finishing
Use the long tails and a tapestry needle to sew the face patch to the front of the head, centered and covering about one third of the face. Sew the ears to the top of the head, about 1 inch apart. Sew the tail to the back of the body. Weave in all ends on the wrong side, tucking them into the stuffing so they stay hidden. Wrap the scarf around the neck (the narrowing between head and body), overlap the ends, and tack it in place with a few small stitches if you like. Gently shape the fox with your fingers and steam or lightly block the scarf flat; do not wet-block the stuffed body.
Pro Tips and Variations
- Swap the scarf colors for any two shades you love, or make it a solid color for an even quicker finish.
- Add a tiny embroidered nose or safety eyes before stuffing if you want a more expressive face.
- Use a smaller hook and finer yarn to make a keychain-sized fox, or a larger hook and blanket yarn for a huggable version.