Noir Eyelet Tablet Sleeve Free Crochet Pattern
Introduction
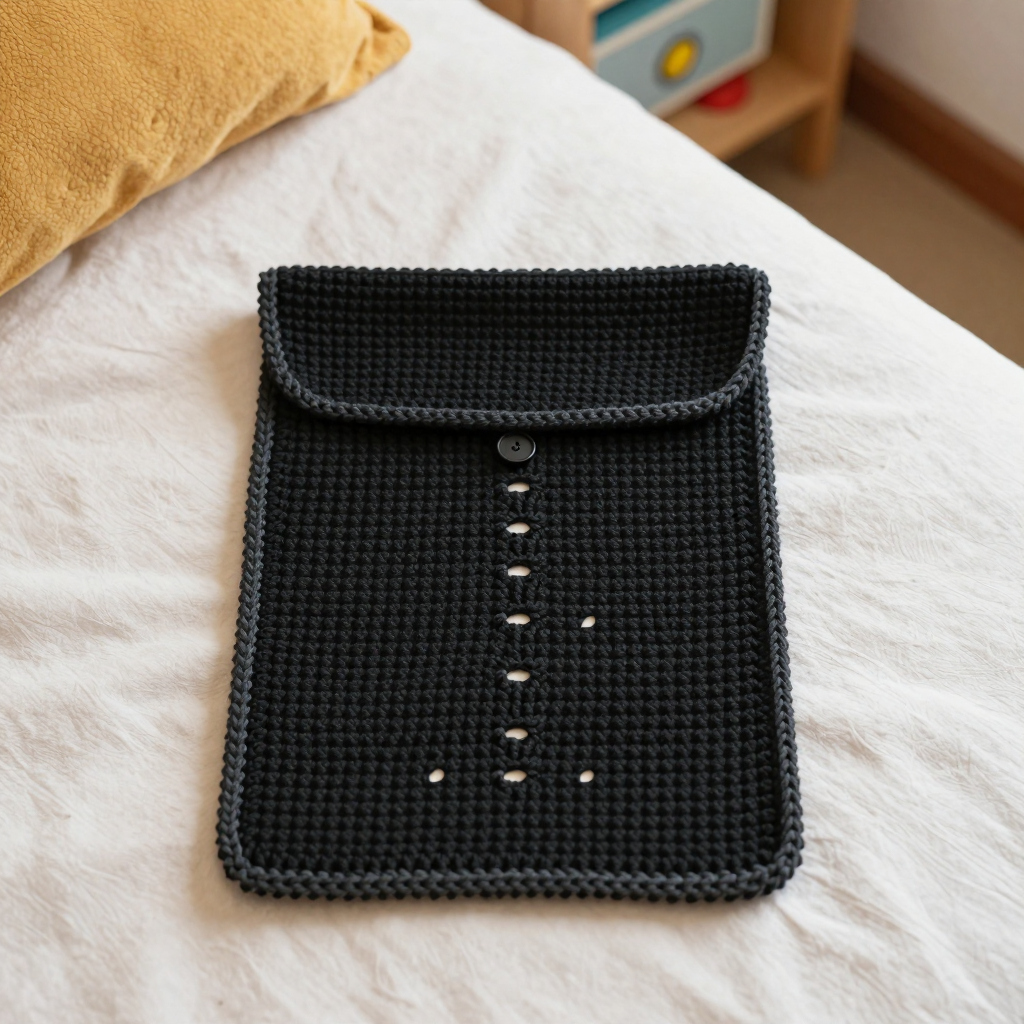
This Noir Eyelet Tablet Sleeve is the perfect first project for anyone who wants something useful, elegant, and quick to finish. Worked in smooth worsted weight yarn with simple single crochet and scattered eyelet rows, it comes together from two flat panels and a folded flap, so there is no shaping to worry about. The deep black yarn with a dark grey contrast edging gives it a clean, Parisian chic look that feels soft and slightly structured in the hand. Slip your tablet inside and you have a cozy, handmade home for your device that looks far more complicated than it really is.
Materials Needed
- Yarn: Worsted weight (4) acrylic yarn — 200 yards black (Color A), 20 yards dark grey (Color B) for the contrast edging
- Hook: 5 mm (H-8) crochet hook
- Notions: Tapestry needle, scissors, one 0.5-inch button, sewing needle and thread
- Finished size: 8 inches wide x 10 inches tall (fits most 9–10 inch tablets)
Abbreviations
- ch — chain: make a loop of yarn and pull it through the loop on your hook
- sc — single crochet: insert hook, yarn over, pull up a loop, yarn over, pull through both loops
- sl st — slip stitch: insert hook, yarn over, pull through both the stitch and the loop on your hook
- sk — skip: leave the next stitch(es) unworked
- sp — space: the gap created by a chain
- st(s) — stitch(es)
- rep — repeat
- WS — wrong side (the back face of your work)
Gauge
16 stitches and 12 rows = 4 inches in the eyelet pattern. Work a small swatch in pattern and measure a 4-inch section; if your stitches are too big, go down a hook size, and if too small, go up.
Tips Before You Start
- Count your stitches after every plain row — each panel should stay at 32 stitches so the two halves line up perfectly when seamed.
- Keep your single crochets relaxed and even; tight stitches make the sleeve stiff and hard to slip a tablet into.
- When working Row 4, be sure to crochet into the chain-2 spaces as well as the stitches so the count returns to 32.
- Make both panels and the flap before seaming, and lay them flat to check they match in width.
Step-by-Step Instructions
Panel (make 2, Color A)
Row 1: Ch 33, sc in 2nd ch from hook and each ch across (32 sts).
Row 2: Ch 1, turn, sc in each st across (32 sts).
Row 3: Ch 1, turn, sc in first 2 sts, *ch 2, sk 2 sts, sc in next 2 sts; rep from * across (8 eyelets, 32 sts).
Row 4: Ch 1, turn, sc in each st and ch-2 sp across (32 sts).
Rows 5–6: Ch 1, turn, sc in each st across (32 sts).
Repeat: Rep Rows 3–6 until the piece measures 10 inches, ending with Row 6. Fasten off.
Flap (Color A)
Row 1: Ch 33, sc in 2nd ch from hook and each ch across (32 sts).
Row 2: Ch 1, turn, sc in each st across (32 sts).
Row 3: Ch 1, turn, sc in first 2 sts, *ch 2, sk 2 sts, sc in next 2 sts; rep from * across (8 eyelets, 32 sts).
Row 4: Ch 1, turn, sc in each st and ch-2 sp across (32 sts).
Rows 5–6: Ch 1, turn, sc in each st across (32 sts).
Repeat: Rep Rows 3–6 until the flap measures 4 inches, ending with Row 6. Fasten off.
Assembly
With WS together, align one panel (the back) and the flap along the top edge. Join Color A with sl st through both layers across the top edge (32 sl sts). Place the second panel (the front) on top, aligning the side and bottom edges. Join Color A with sl st through both layers around the sides and bottom (68 sl sts).
Edging
Join Color B at the top right corner. Ch 1, sc evenly around the entire outer edge, working 3 sc in each corner. Join with sl st to the first sc. Fasten off.
Closure
Sew one 0.5-inch button to the center of the front panel, 1 inch below the top edge. Use an eyelet in the flap as the buttonhole.
Assembly and Finishing
Weave in all ends with your tapestry needle, working them into the wrong side of the fabric so they stay hidden. Gently steam-block the finished sleeve: mist it lightly, shape it flat to 8 x 10 inches, and let it dry completely before attaching the button. Check that the flap folds down smoothly over the front and that the eyelet lines up with the button before you sew it in place.
Pro Tips and Variations
- Swap the dark grey edging for a deep burgundy or cream for a different accent color.
- Add a second button and use a different eyelet row for an adjustable closure.
- Work a few extra plain rows on the flap for a longer, more slouchy fold-over look.