C2C Spring Garden Square Free Crochet Pattern
C2C Spring Garden Square Free Crochet Pattern
Introduction
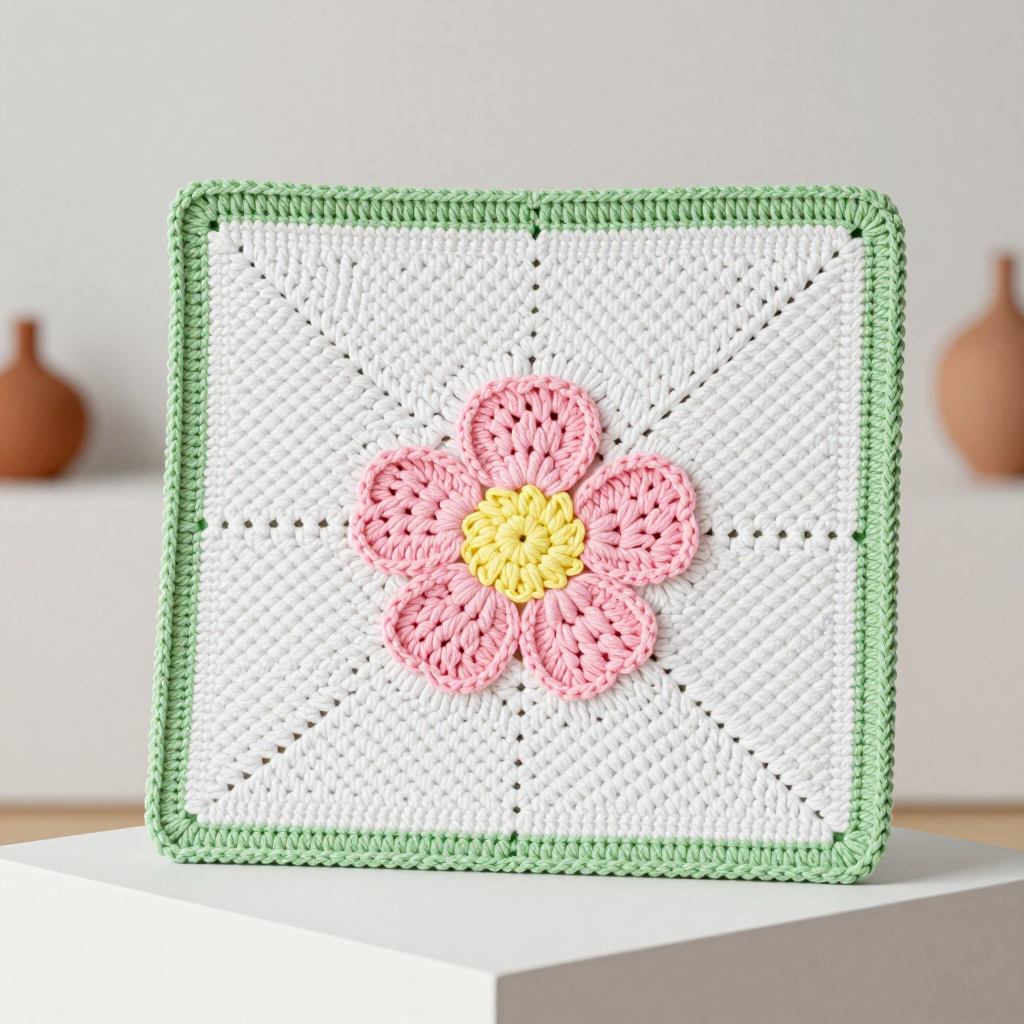
This corner-to-corner square is a gentle introduction to C2C crochet for anyone who has mastered the basic stitches and wants to try something new. Worked in soft white worsted weight yarn, it grows diagonally from one corner to the next, then shrinks back down to form a neat 16" square. A pastel pink five-petal flower with a sunny yellow center is appliqued in the middle, and a fresh green border frames the whole thing. It looks like a little garden plot stitched in yarn, and it feels soft, squishy, and light in the hand. Make one for a pillow, a wall hanging, or start collecting squares for a spring blanket.
Materials Needed
- Yarn: Worsted weight (4) acrylic yarn in four colors:
- Color A (white): 150 yards
- Color B (pastel pink): 50 yards
- Color C (pastel yellow): 30 yards
- Color D (pastel green): 50 yards
- Hook: 6 mm (J/10) crochet hook
- Notions: Tapestry needle, scissors, stitch markers (optional), blocking mats and rust-proof pins
- Finished size: 16" x 16" (19 blocks x 19 blocks)
Abbreviations
- ch – chain
- dc – double crochet
- sc – single crochet
- sl st – slip stitch
- sp – space
- st(s) – stitch(es)
- block – one C2C unit: 3 dc worked into a ch-3 space, followed by ch 3
- increase – add one new block at the beginning of a row by chaining 6 and working a block into the chain
- decrease – skip the first block of a row by slip stitching across it, then continue in the next space
Gauge
5 blocks = 4.25" wide by 4.13" tall (1 block = 0.85" x 0.826"). Work a few rows of blocks and measure across 5 blocks; if your blocks are larger, go down a hook size, and if smaller, go up.
Tips Before You Start
- Count as you go. Each row gains or loses exactly one block, so the block count tells you instantly if something went wrong. Count at the end of every row.
- Turn the same way every time. Consistent turning keeps the diagonal texture even and the edges straight.
- Keep your ch-3 spaces loose. The next row's blocks are worked into those spaces, so tight chains make the square pull in at the corners.
- Work the whole square in white first. The flower is added afterward as a separate applique, so there are no mid-row color changes to juggle.
Step-by-Step Instructions
Square Body (Color A)
Worked in C2C blocks (3 dc + ch 3). Start at the bottom right corner and increase to 19 blocks wide, then decrease back down.
Row 1: Ch 6, dc in 4th ch from hook, dc in next 2 ch, ch 3, turn, 3 dc in ch-3 sp, ch 3, turn. (1 block)
Row 2: Ch 6, dc in 4th ch from hook, dc in next 2 ch, ch 3, turn, 3 dc in ch-3 sp, ch 3, turn, 3 dc in same ch-3 sp, ch 3, turn. (2 blocks)
Rows 3–19: Increase 1 block at the start of the row, then work 1 block in each remaining ch-3 space across, ending with ch 3 and turn. Each row adds one block: Row 3 (3 blocks), Row 4 (4 blocks), Row 5 (5 blocks), Row 6 (6 blocks), Row 7 (7 blocks), Row 8 (8 blocks), Row 9 (9 blocks), Row 10 (10 blocks), Row 11 (11 blocks), Row 12 (12 blocks), Row 13 (13 blocks), Row 14 (14 blocks), Row 15 (15 blocks), Row 16 (16 blocks), Row 17 (17 blocks), Row 18 (18 blocks), Row 19 (19 blocks).
Row 20: Decrease 1 block (sl st across first 3 dc and into ch-3 sp, ch 3, 3 dc in same sp), then 18 blocks A. (19 blocks)
Rows 21–37: Decrease 1 block at the start of the row, then work 1 block in each remaining ch-3 space across. Each row loses one block: Row 21 (18 blocks), Row 22 (17 blocks), Row 23 (16 blocks), Row 24 (15 blocks), Row 25 (14 blocks), Row 26 (13 blocks), Row 27 (12 blocks), Row 28 (11 blocks), Row 29 (10 blocks), Row 30 (9 blocks), Row 31 (8 blocks), Row 32 (7 blocks), Row 33 (6 blocks), Row 34 (5 blocks), Row 35 (4 blocks), Row 36 (3 blocks), Row 37 (2 blocks).
Row 38: Decrease 1 block. (1 block) Fasten off.
Flower Center (Color C)
Rnd 1: Make a magic ring, 6 sc in ring, join with sl st to first sc. (6 sc) Fasten off, leaving a long tail for sewing.
Petals (Color B) – make 5
Row 1: Ch 4, 3 dc in 4th ch from hook, ch 3, sl st in same ch. Fasten off, leaving a long tail. (1 petal)
Border (Color D)
Round 1: Join to any corner, ch 1, sc evenly around entire square, working 3 sc in each corner. Join with sl st to first sc. (approx 80 sc per side, 320 sc total)
Round 2: Ch 1, sc in each sc around, 3 sc in each corner. Join. Fasten off.
Assembly and Finishing
Sew the yellow center to the middle of the white square using the long tail and a tapestry needle, catching only the surface so the stitches don't show through the front. Arrange the 5 pink petals evenly around the center and sew each one down the same way, tucking the petal bases slightly under the center circle. Weave in all ends on the wrong side. Block the square to 16" x 16": mist it lightly, pin each corner and edge straight with rust-proof pins, and let it dry completely. The border and flower will sit flat and crisp once dry.
Pro Tips and Variations
- Change the palette: Swap the pastels for autumn tones (rust petals, mustard center, olive border) or a single-color flower for a more modern look.
- Make a set: Work the body in different background colors and join finished squares into a blanket, alternating flower colors for a garden effect.
- Try a thicker border: Add a third round of sc, or work a round of dc for a wider, more substantial frame on pillows.